Tuesday, May 5, 2026
Wednesday, April 29, 2026
My first POTA 2fer, with a QRP radio, and a Solar Storm! by David Saylors
Today saw the old red Chevrolet transporting my POTA gear over to Chickamauga Battlefield National Military Park which is park number US-0716. I have activated this park many times in the past, but unbeknownst to me was that the location I usually used to activate this park also allows for the activation of the Trail of Tears National Trail as well as it follows old HWY 27 right through the park! I have been activating a 2fer for years now and had no idea…live and learn.
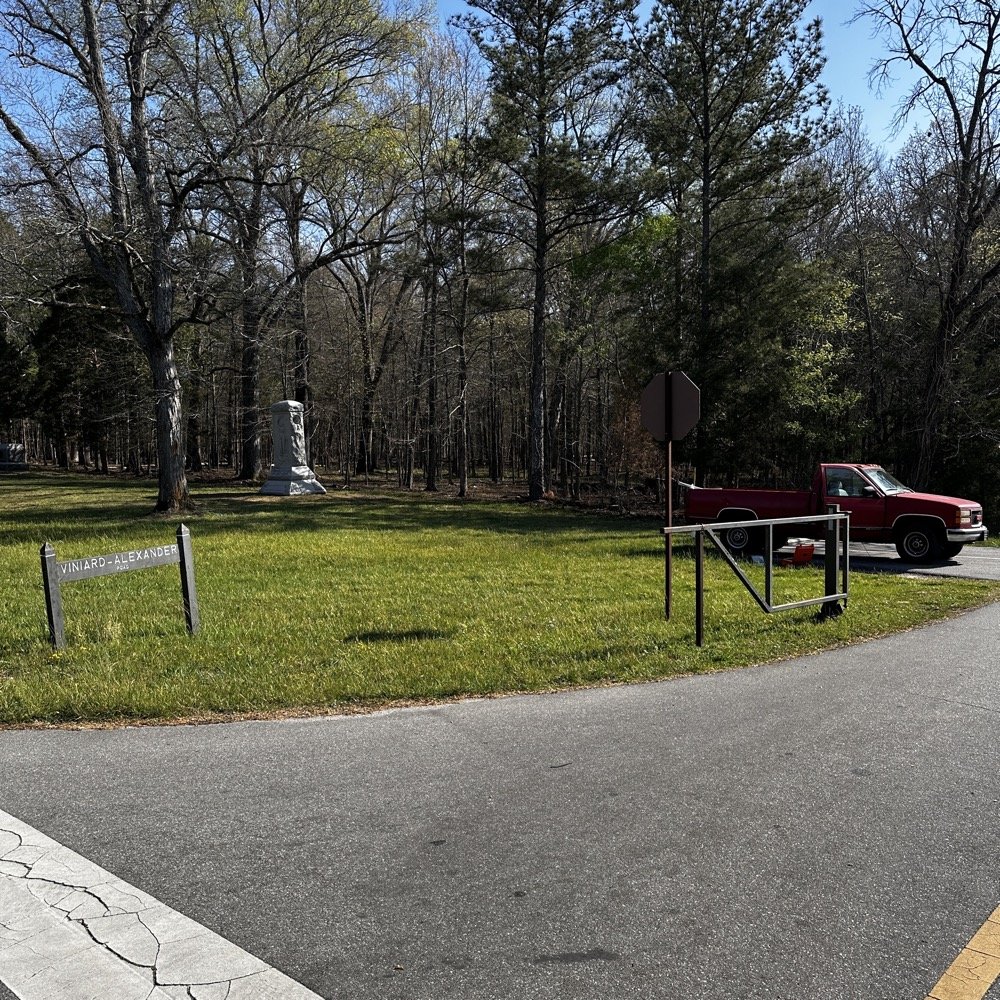
This “parking lot” has only 2 spaces in it, but it is close enough in proximity to the main road to allow for a 2fer when activating POTA
I arrived on station to find that only one spot was available and no one around the truck. This matters as Dan (K2DTS) had mentioned dropping by to see the CW setup and to observe a CW activation for a little while. Turns out the car in the other space was not him. He would arrive later, which was a much needed “shot in the arm” to lift my spirits. You see, today was one of those days when the sun was really angry while I was setup to activate. The solar K index was either 5 or 6 which isn’t good…especially for QRP… My QSO count today was not all that high, but I still had a relaxing and fun time at the park none the less.
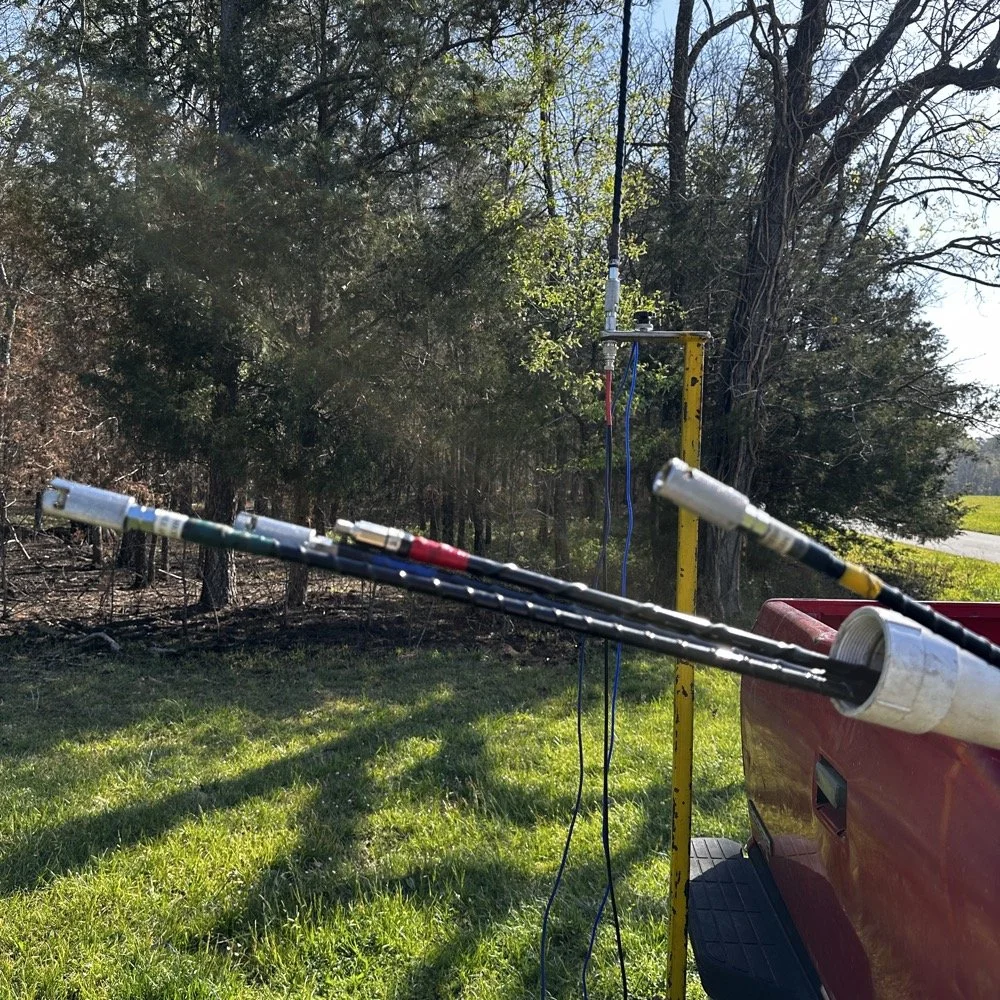
This location works well with my truck mounted antenna setup that I built. I used my old reliable hamstick collection today to get on the air and true to form, they worked pretty well. I have also refined my tuning system as well. I will give you the quick rundown on how I do it now. This works especially well with hamsticks as you will soon see.
Hamsticks are a very viable antenna system for POTA activators. They are easy to setup and work reasonably well for their tiny size. They usually have good power handling so digital modes like FT8 and even good ole CW are not a problem for them. Of course SSB is always fine if they can handle CW…
My Hamstick Antenna System and Color Coding Setup
Above is my modest hamstick collection to date. This is the 5 bands I use the most and I wished I also had the 10 meter version as well…but I digress. It is a good idea to do something to tell them apart. The labels are not very durable from what i have seen and so I chose to color code mine with various colors of electrical tape instead. Red - 40meters; Blue - 30 meters; Yellow - 20 meters; Brown - 17 meters; and Green - 15 meters. These are what I have been using for a long time now and they work well. These are made by three different companies too so the brand doesn’t really seem to matter. I have also converted mine over to the QD attachment design so that I can change bands fairly fast…well it is faster than threading them into the socket…haha. I have owned and used this exact setup for quite some time now as you can see from this blog post I wrote a good while back.
I also store them inside a PVC pipe I made into a storage tube. It is almost 8’ long so I can keep the “stingers” on all the base load coils which prevents me from mixing the wrong tip with the wrong load coil. I built this tube steel mount to fit inside the 2” receiver on a pick up truck, this allows for it to do two things at once. 1) It allows the antenna to be setup quickly and easily on any vehicle with a standard receiver mount. 2) I also built it so that it makes the base of the antenna at around 6’ above the ground. Getting the antenna higher does help with take off angle so I made the decision to make it taller than most. This also made it possible to string some radials at various angles so I can play with the impedance by adjusting the radials. If you look close in the lower photo, you can just see the radials connected to the base of the mount and running down out of the frame. These were tuned for 17 meters like this and they worked incredibly well in this configuration. When you only have a few watts like with the Penntek TR-35, you need all the help you can get…haha.
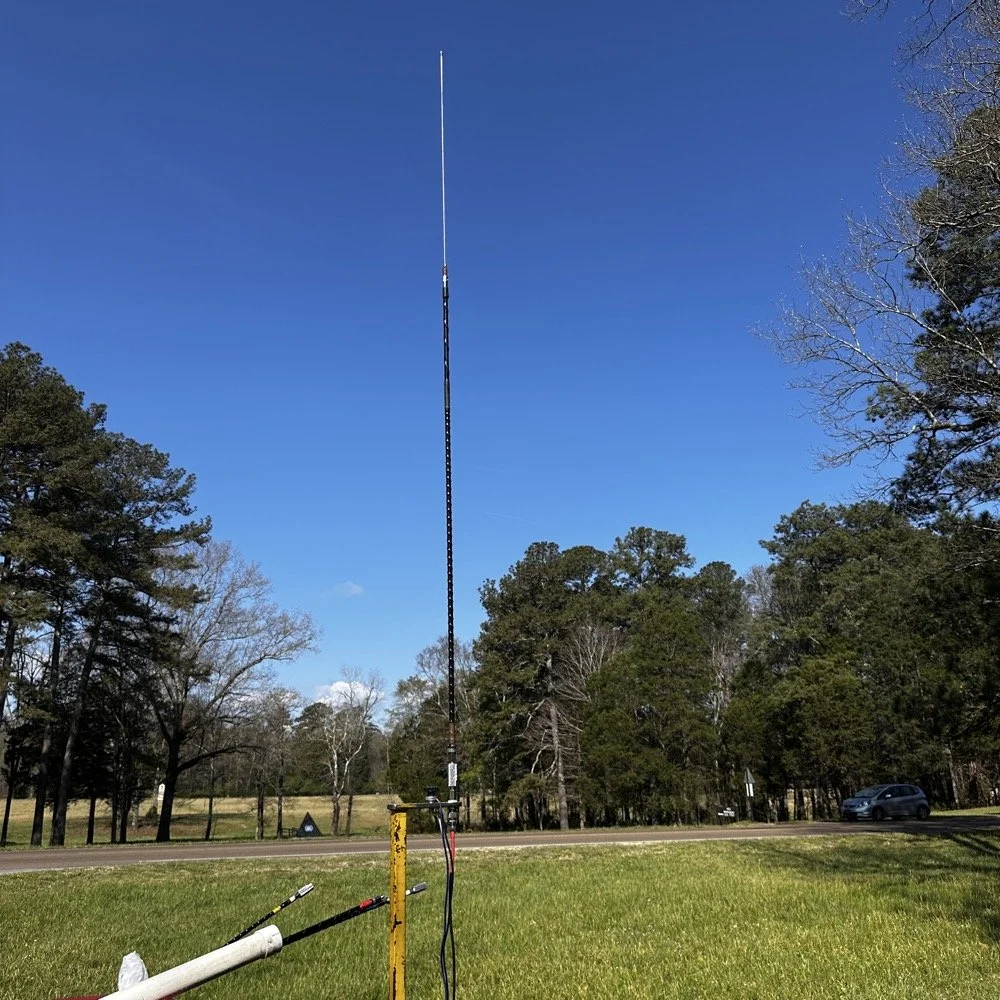
17 meter hamstick deployed during a POTA activation for CW and FT8 use. You can also see the highway in the background that is designated the Trail of Tears trail as well.
I setup in the passenger seat again, but to be honest, this was not ideal. I struggled to get all the stuff connected and stationary today. I also had a problem with the battery in the little power pack I had built…it was completely dead for some reason. I had used it recently but I didn’t think I had tanked it, anyway, not to be dissuaded I decided to get out the 8Ah battery and find a spot for it as well so I could power the station. You see, I needed the “power pack” so I would have a speaker. I figured that since Dan was going to drop by and hand out some, that I would make it to where he could hear the CW as well. This setup finally settled in and I was able to get on the air. This is when I figured out that the sun was angry…
I looked on the POTA spot page to look for a clear spot and there was only one other ham on the spot page, on 20 meters, in the middle of the day… Do you understand what this means? 20 meters is literally the honey pot of the HF bands when it comes to POTA. There is literally 2 dozen CW ops at times on this band and then there will be 2 on 17 meters. It will be that drastic and today there was me and one other guy in the Carolinas and that was it. Optimistic that I could at least get my ten in short order, I fired up the radio, dialed through the literal ghost town that was 20 meters and settled on a frequency around 14.063mhz and started calling CQ. It took about an hour to get my ten plus a few more, but I finally got them. In an attempt to get some stations I could hear in the noise, I even switch to headphones as you can hear MUCH weaker signals if you goto headphones over the external speaker that I am using. This trick didn’t work either as it turns out, that there has to be stations on the air for you to actually hear them… I had seemingly forgotten this minor detail on this day…lol.
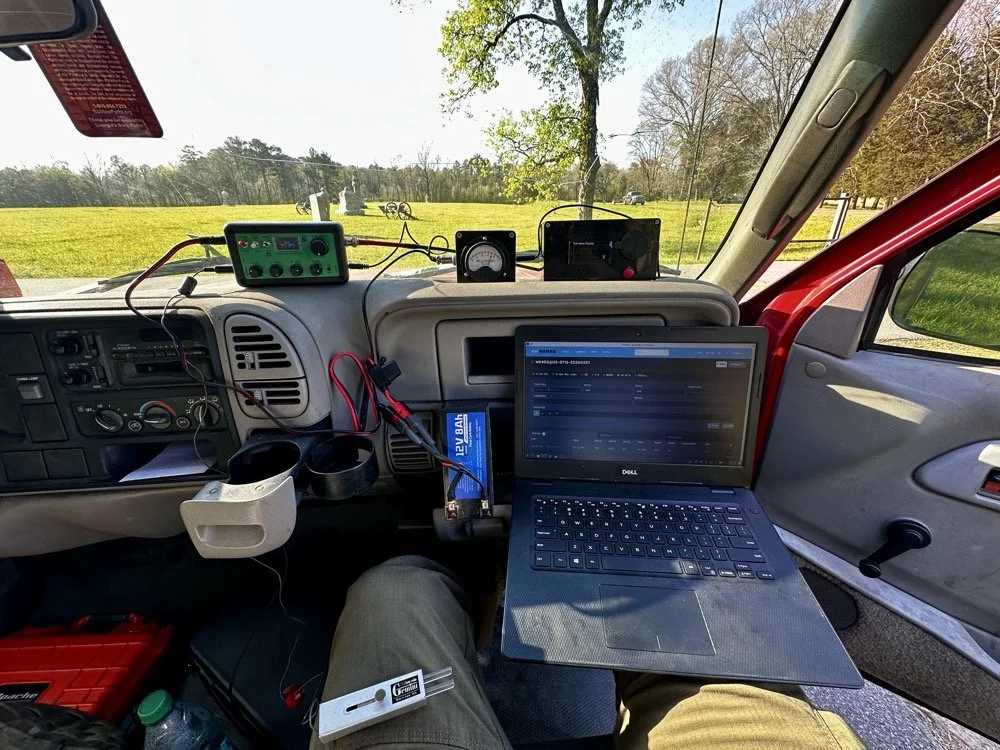
POTA CW station ready for use, including the Penntek TR-35, home brew S meter and battery pack/ speaker combo unit. Also the Gemini travel CW key and the Dell Inspiron computer with HAMRS for logging.
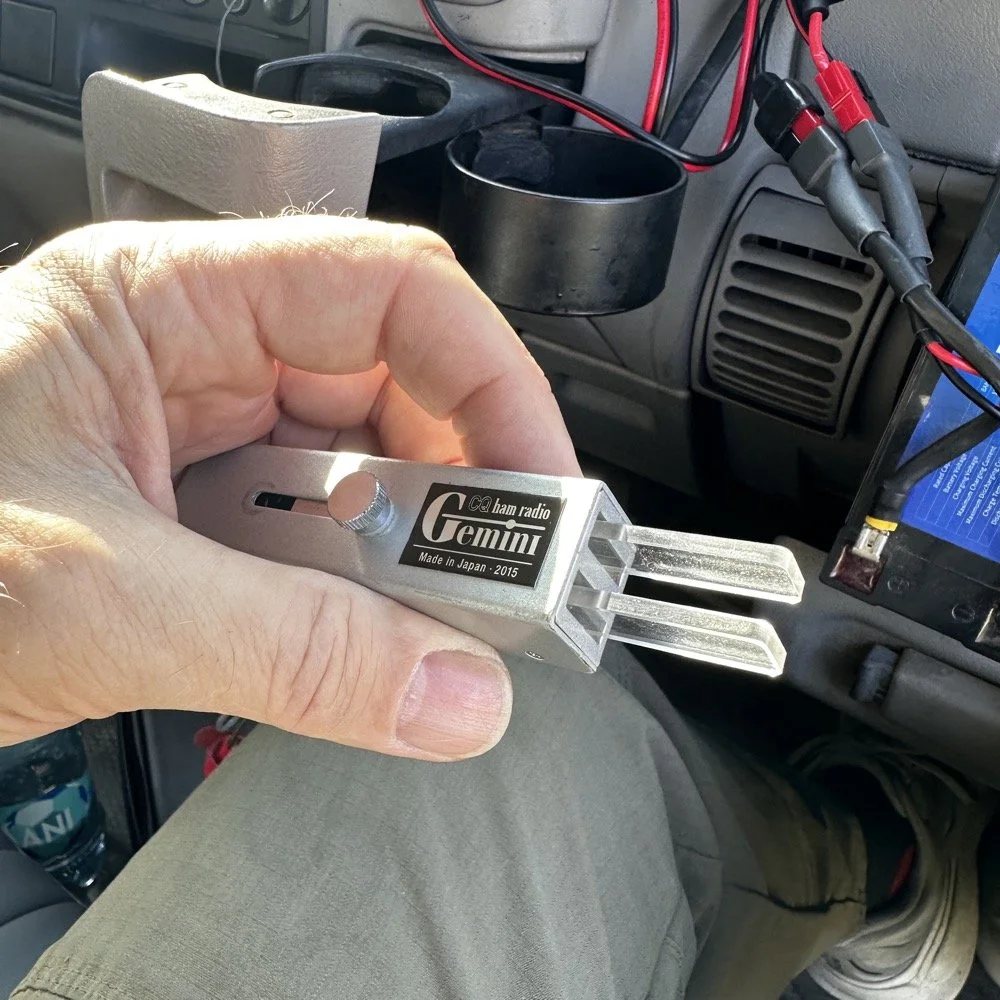
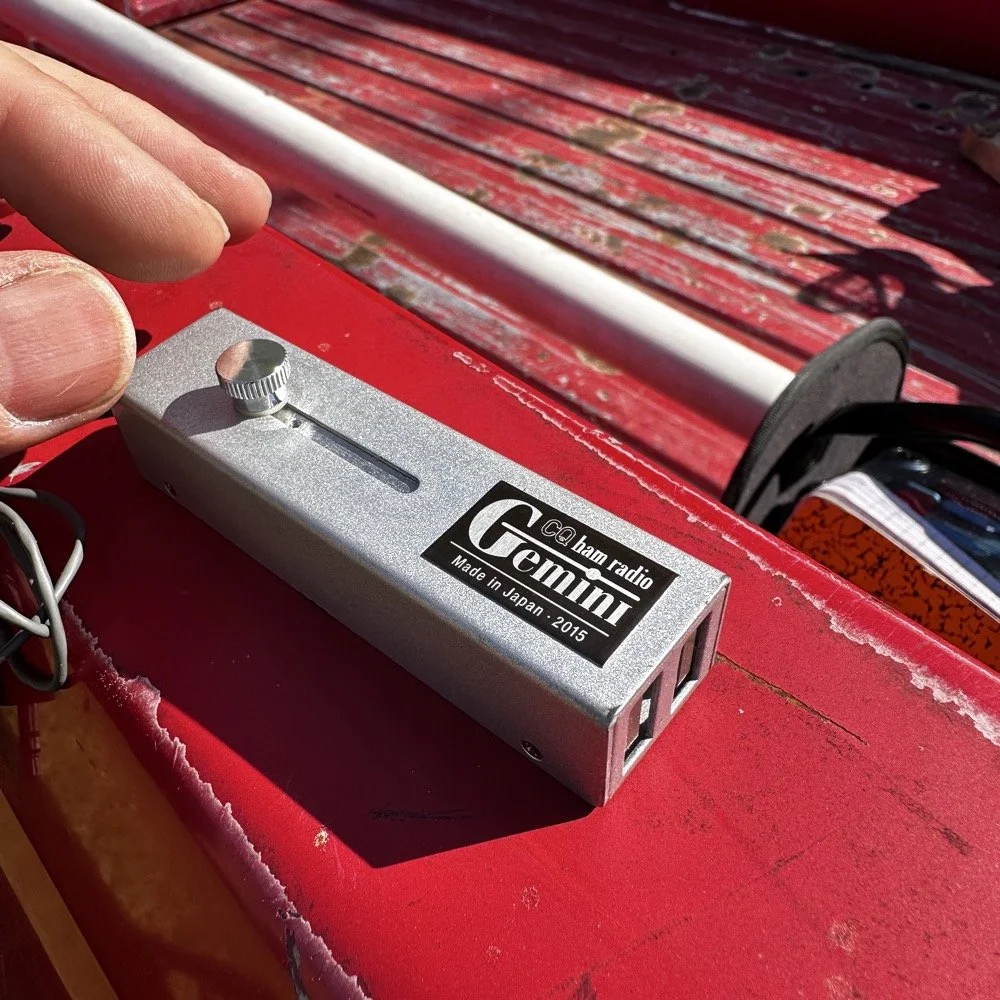
CQ Ham Radio - Gemini travel CW key is really well designed and cost effective. This is one of my favorite CW keys when I dont have a surface to set the Begali Traveler on.
The Gemini CW Key: A Collapsible Treasure from eBay
Let me introduce you to one of my favorite travel CW keys that I use for POTA operations. This is a key I bought off of eBay initially and as of this writing, it seems to be the only place to get one of these keys now. Maybe an opportunity for a creative solution here… lol. Anyway, these are darling little keys that work beautifully and I always enjoy getting this one out. As you can see below, the reason I like this key is how it stows the handles when not used. You simply loosen the screw on top a little, slide the screw to the rear and this collapses the paddles inside the housing which protects the from damage when stored in less than ideal conditions. This key also is dead simple, lacking any sort of adjustments at all, you just plug it into the radio and use it. I like that to be honest…
GHD CW Key for portable CW operations like POTA.
Operating QRP During a Solar Storm (And Why 20 Meters Was a Ghost Town!)
So after I struggled around for a little over an hour to put 15 calls in the log…well…14 since one was a dupe… (duplicate calls on the same band, park, day and mode dont count to your POTA score)…I decided to put up the headphones and get out the HF Signals sBitx and work some FT-8 on 17 meters. I had not seen Dan so I figured the honey-do list got him or something and put away the CW gear while FT-8 hummed along in the background.
A lot of times, I will run FT-8 while I do house keeping chores like putting up radio gear from a different mode that I had just finished using or talking to the wife on the phone about what she wants me to do next after I finish playing radio… you get the idea. I can do some other things while keeping an eye on the display and letting it run in auto mode for a while. Well, not today buckaroo, seems the band were so bad that I couldn’t get auto to work today very well. I called CQ for a while to no avail. I finally started hunting other stations can answering their CQ instead. Switching to this tactic netted me 5 more contacts before I closed out the log for the day. 18 valid QSOs will do just fine…actually, 36 since I activated the 2fer today!
If you will notice the waterfall in the photo below, you will see that there really were not that many stations on the FT-8 segment…which is usually choked pretty tight with stations. The bands were just that bad. Even with these terrible conditions, I was still able to get 5 calls in the log for today on FT-8!
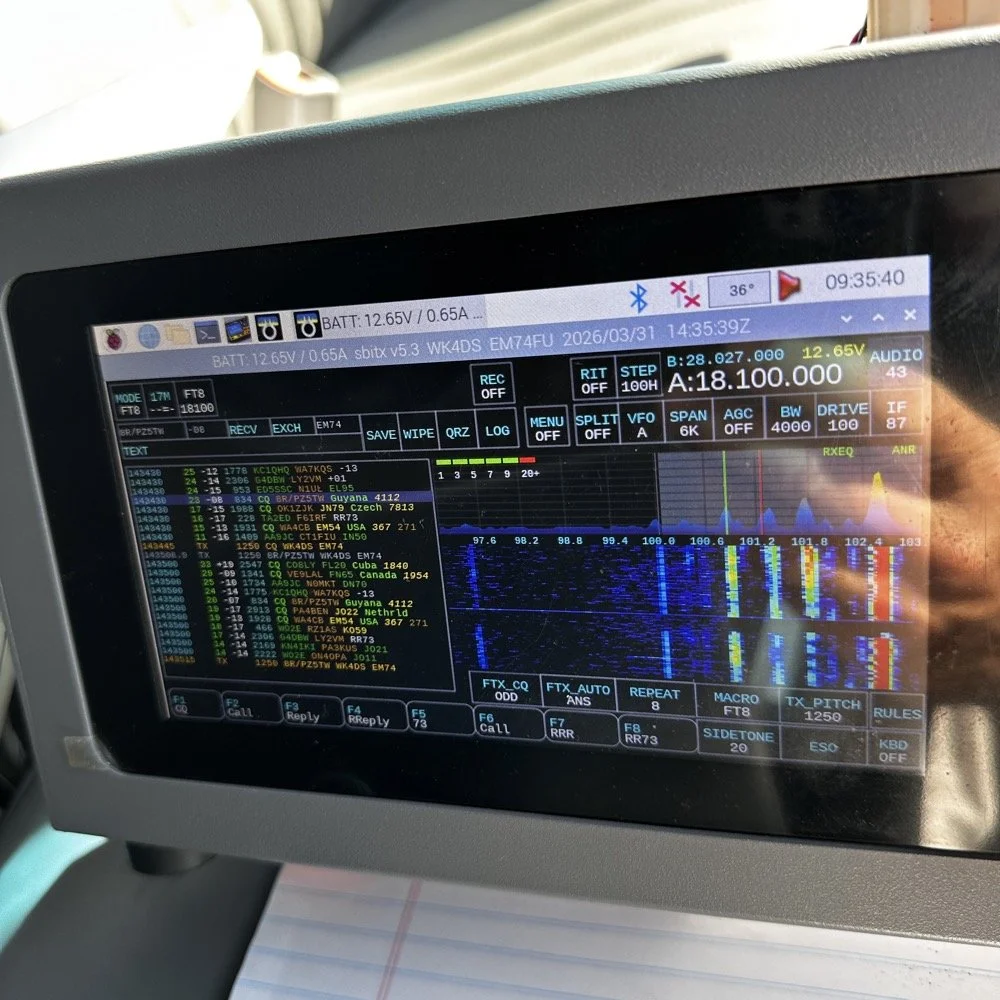
sBitx by HF Signals is a SDR powered by a Raspberry Pi 4 or Pi 5 SBC and does all sorts of things a regular radio can not do.
Meeting Dan (K2DTS) and the Ham Radio Community
While I was taking some of these photos and cleaning up the unneeded ham gear after switching to FT-8, look who stopped by to say hi and see the station! Dan (K2DTS)! He missed my CW portion of the activation and instead of setting it all back up, I did show -n- tell with him about all the gear I had brought to the activation. You have to understand that this is fairly substantial…haha. We talked for probably 20 minutes or maybe even a little longer about all sorts of things and had a great eye-ball QSO. I hope we can link up again at some point so I can get him on the air with CW so he can make some contacts too.
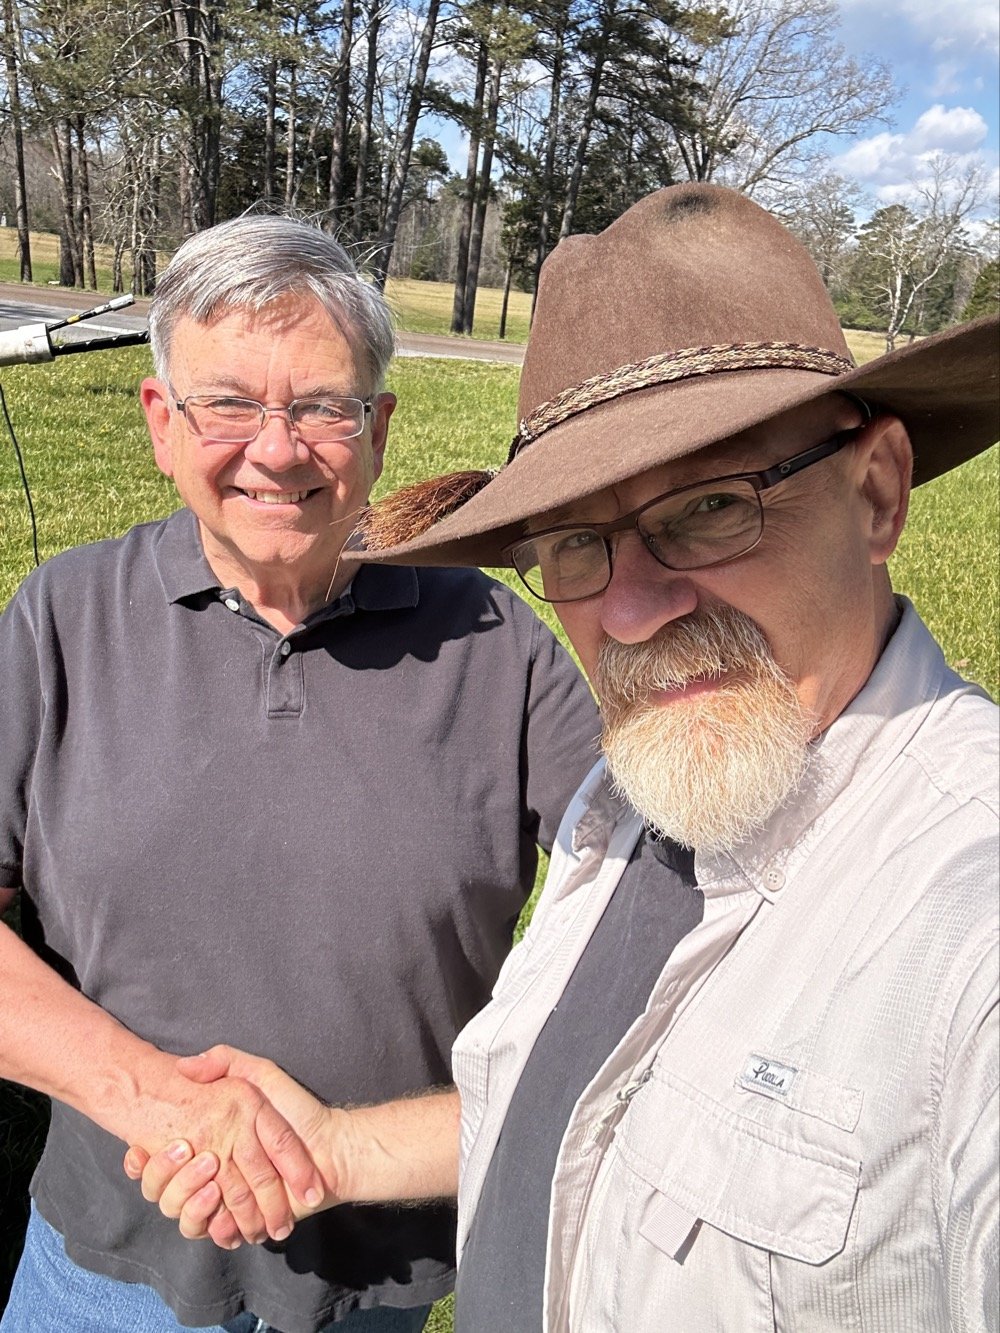
Ham radio is a wonderful community that has a large number of great people like Dan (K2DTS) who came out to the activation site today to see the setup.
Some days you don’t have to make a ton of contacts (although this never hurts…haha) to have a good time. Any day at a park with a radio is better than your best day at work. Knowing this I will always choose POTA over going to work… lol. Thanks for coming along today and I hope to work you on the air soon!
72
David - WK4DS
You can help support this website by using these Amazon Affiliate Links:
QRP/Portable Radios:
Antennas & Tuning:
CW Equipment:
Power & Accessories:
Organization & Transport:
BONUS ITEMS
Teaching Montana History: Teaching with Cemeteries
Teaching Montana History: Teaching with Cemeteries: Last week we hosted our final Social Studies Third Tuesday for the year. Three MTHS Teacher Leaders in History--Jodi Delaney (Helena, grades...
Tuesday, April 28, 2026
Super Portable & Super Fun: Pairing the KX2 and AX1 at Duke Homestead State Historic Site
by Thomas (K4SWL)
On Tuesday, March 24, 2026, my wife and I were in Durham, North Carolina, visiting a few places for the day. Earlier that morning, I had already activated Bennett Place State Historic Site using my Xiegu G106 and my Just OK Mini antenna—a really fun activation.
That afternoon, we had just enough time to squeeze in one more short activation before meeting our daughter for dinner in Raleigh. I had already picked the spot: Duke Homestead State Historic Site (US-6838)—a park I’d been wanting to visit for a few months.

We drove over to Duke Homestead, which is very close to downtown Durham, and the grounds were beautiful. The site has quite a bit of open space, and as soon as we pulled into the parking area, I noticed a large section with picnic tables that looked ideal for Parks on the Air. I also saw plenty of people walking across the road and onto the grounds—walking dogs, taking strolls, and simply enjoying the space. It’s obviously a well-loved gathering place for the community, and it looked like the grounds were open pretty much all the time.
 My wife decided to tour the grounds while I set up for the activation. The plan was simple: I’d get on the air, make my contacts, then track her down and do a quick tour myself before we had to head to Raleigh.
Keeping it simple
 To keep things easy, I grabbed my Elecraft KX2 and Elecraft AX1 combo from my LowePro CS60 hard-sided case and walked over to one of the picnic tables.
 Setup was quick because this is a combination I’ve used so many times before. I opened the logbook, found a clear frequency on 20 meters, pressed the ATU button for a quick match, and I was off to the races.
Gear
 Note: All Amazon links are affiliate links that support QRPer.com at no cost to you.
Radio
Antenna
- Elecraft AX1with 3D-printed Bipod (clip and knob by K6ARK and bipod legs by KE8PTX)
Pack/Case
- GoRuck GR1 USA (21L)
- HEROCLIP Carabiner Clip (attached to my backpack)
- LowePro CS60 Hard Side Case
Logging
Camera/Audio Gear
- DJI OSMO 4 action camera with Joby Telepod Sport Tripod
On The Air
 As soon as I started calling CQ POTA and spotted myself, the park hunters started calling back.
 I ended up logging a total of 15 contacts in just 14 minutes—quick and easy.
 Honestly, I probably would have stayed on the air a little longer, but after that 15th contact there was a brief lull where no one was calling.
 I took that as my cue to go QRT so I could meet back up with my wife and spend a little time exploring the site.


QSO Map
Here’s what this five-watt activation looked like when plotted out on a QSO Map. Click on the map image to enlarge.


Activation Video
Here’s my real-time, real-life video of the entire activation. As with all of my videos, I don’t edit out any parts of the on-air activation time. In addition, I have YouTube monetization turned off, although that doesn’t stop them from inserting ads before and after my videos.
Note that Patreon supporters can watch and even download this video 100% ad-free through Vimeo on my Patreon page:
Click here to view on YouTube.
The museum and the history
 After packing up the radio and camera gear and putting everything back in the car, I walked into the visitor center and met up with my wife. We spent some time in the small museum, which tells the story of the Duke family and the role tobacco played in North Carolina’s history.
It’s impossible to separate tobacco from the story of North Carolina. For generations, it shaped the economy, communities, and livelihoods across the state. Preserving that history matters—not because it should be celebrated uncritically, but because understanding it helps us better understand where we came from.


That history, of course, includes both progress and deep harm. Tobacco wealth was closely tied to systems of exploitation, including slavery, harsh labor conditions, and later the well-known health consequences tied to tobacco use itself. I appreciated that the museum presents this history as something complex—something that brought prosperity for some while carrying very real human costs for others. It’s important history, and I’m glad it’s being preserved with that context in mind.
The grounds
 After the museum, we walked the grounds, which were expansive and really beautiful. I’ve included a few photos below of some of the original buildings from the old homestead and the tobacco barn.
 Just like when we arrived, there were people all around enjoying the pleasant weather and the park itself.
I’m looking forward to going back and activating Duke Homestead again—next time with a little more time to really explore.


This site gets activated a lot, and it makes sense. It’s so close to Durham, Hillsborough, and Raleigh that it’s a very convenient POTA stop.
As with all State Historic Sites, I try not to put any spikes in the ground—or even toss lines into trees—until I know from the staff that it’s allowed. Most historic sites don’t want stakes in the ground, and while some will allow lines in trees, it’s always best to ask first.
That’s one of the great things about the setup I used here: it requires none of that. It’s simple, effective, and very low impact—perfect for places like this.
Thank you!
 Thank you for joining me during this short activation!
I hope you enjoyed the field report and my activation video as much as I enjoyed creating them!
 Of course, I’d also like to send a special thanks to those of you who have been supporting the site and channel through Patreon, and the Coffee Fund. While not a requirement, as my content will always be free, I really appreciate the support.
As I mentioned before, the Patreon platform connected to Vimeo makes it possible for me to share videos that are not only 100% ad-free but also downloadable for offline viewing. The Vimeo account also serves as a third backup for my video files.
Thanks for spending part of your day with me!
Spread a little kindness wherever you go in the world!
Cheers & 72,
Thomas (K4SWL)
PS: Consider joining our QRPer.net discussion board! It’s an active community of radio operators who enjoy helping and supporting each other. It’s also the best place to ask any questions you might have about radios, field activities, antennas, or pretty much anything amateur radio. Click here to join.
Subscribe to:
Posts (Atom)