Monday, July 31, 2023
Ukraine and Human Extinction - LewRockwell
Sunday, July 30, 2023
PART 2 – KITE OPERATION: VO1DR GOES QRP PORTABLE IN CENTRAL NEWFOUNDLAND VIA FLOAT PLANE by THOMAS WITHERSPOON
Many thanks to Scott (VO1DR) who shares the following guest post:

Portable/Kite QRP Operation in Central Newfoundland Wilderness by Float Plane: Part 2 – Radio Gear and Portable/Kite Operation
by Scott Schillereff, VO1DR
Introduction
This is Part 2 of a two-part story of a portable QRP adventure with a kite antenna at Mount Sylvester in the Bay du Nord Wilderness Area in central Newfoundland by float plane.
Part 1 described the setting, history, geology, access, and outdoor/survival gear.
Part 2 here describes radio stuff and some dramas with kite antenna operation. I hope you enjoy reading this.
Radio Gear
Given that our hike up Mount Sylvester would be relatively easy (about half an hour up a gentle bedrock slope), I chose to bring a fair bit of radio gear with lots of backups.


The Kite
A common kite style used for antennas is a sled kite. Rigid sled designs maintain their flying shape with struts, while soft sled designs use a rigid air-filled tube (tapering Venturi tube) to maintain flying shape.
I chose a soft sled design since it can be folded and easily packed, but it can be a bit harder to get aloft.


Portable Operations on Mount Sylvester
After reaching the top and poking around, I found what I thought would be a great spot for an operating position, near the up-wind cliff edge. This gave me just enough distance to lay out my kite and antenna (on the ground), anchor things, then stretch the kite line tight, fill the kite side tubes with wind, release it, and watch it gracefully sail upwards, carrying my 31 m (102 ft) end-fed wire aloft! But my great expectations were dashed…repeatedly.

I tried getting the kite aloft many times. There was moderate wind which appeared to be directly toward me, but each time I raised the kite, it would fill up with wind but, when released, it would immediately turn, distort and crumple into the ground. It finally dawned on me what was happening – have you figured it out?

So, we literally “upped stakes” and moved everything about 1/3 down the slope, away from the summit, tried again, and the kite shot up like a rocket! My antenna wire was loosely attached to kite line and came back to my operating position at the kite anchor point. This formed an end-fed sloper at about 60o inclination with low end toward the S-SW.
A comment about the kite antenna: I did not think this through. I was more concerned on getting the kite built and flying; thinking that “a Z match can tune anything”. I know a 102 ft doublet makes a pretty good multi-band antenna (with open line and an ATU), so I thought “why not try it as in an end-fed configuration, hanging along an inclined kite line?”
I had a couple of radials (one 9.8 m/32 ft; and one 2.0 m/6.5 ft), so I brought those along to try. I had several hi-Z to low-Z couplers (56:1, 49:1, 36:1) that I have used successfully with other end-feds, so I stuck one of them in the kite configuration. That’s about the extent of it. I think this whole set up was poorly-conceived and turned out to perform poorly (see below). Plenty of “room for improvement”.


Within the ATU, I had soldered a 1 megohm 1W carbon resistor from the antenna center lead to ground. At RF, this causes a negligible power loss, but effectively bleeds off electrostatic energy generated by the wind blowing over the kite line and antenna wire.
At the base of the kite antenna, I connected a 49:1 coupler, with 5 m of RG-174 coax (laid on ground) to the input of my ATU. I added the two radials laid along the ground (essentially bare granite) and connected them to the coax BNC housing leading from the coupler. Also, I drove the two electrostatic grounding stakes (metal tent pegs) into shallow soil and clamped the ES grounding wire to the barrel of the BNC connector entering the ATU.
After raising both antennas, I tried the kite antenna first. During the days here, the 20, 17, and 15 m bands are typically open. I tuned the kite antenna for low SWR on 17 m using the ATU with a good match (<2:1). I could hear (and see on waterfall) many CW signals. I called about 10 stations over the course of 30 minutes using output powers ranging from 1-10 W, but not a single reply. Odd – something wasn’t right; usually /P contacts come easy.
I then tried the pole-mounted end-fed and quickly raised Larry, WB9ICH, in New London, Wisconsin with 3W (distance about 2,660 km (1,650 mi)); my RST 559. The end-fed pole antenna was working fine! I had a long QSO, describing my equipment, setting, and antennas. I tried an A/B live antenna comparison by switching to the kite antenna and retuning, then back to the pole end-fed. Larry told me the kite antenna was definitely worse, nearly lost in the noise. On reflection, I can see a number of possible reasons for this:
- insufficient radials for the 31 m kite antenna,
- improper impedance transformation at coupler,
- propagation from the inclined sloper kite antenna propagation was directed either skyward (cloud-burning) or toward the S-SW (which from central NL is nothing but ocean until ~Cuba), and/or
- a faulty piece of coax from the kite antenna.
Based on reading and videos of more knowledgeable kite antenna users, I have since abandoned the 31 m kite wire and gone with a 40 m half-wave vertical (about 19.8 m, 65 ft long) along with those same radials and a 5 m piece of RG-174 coax. In later testing, using a nanoVNA while this wire was suspended vertically from the kite line, I trimmed the antenna length for low SWR on 40, 20 and 15 m. It works adequately on those three bands without an ATU (but better with an ATU). Still, I feel the 40 m HW vertical kite antenna performance is not as good as the HB9EAJ Standard end-fed antenna system.
I admit I am a newcomer to kite antennas. I welcome advice and direction to learn more. I’m getting the kite flying figured out; it’s the performance of the antenna that is still not great. I would like to figure out both vertical and sloper kite antenna set ups that work well (within constraints of /P use) and ideally better than a pole-mounted HB9EAJ-style lazy-7 end-fed set up). Kites are fun, but if the antenna performance is only mediocre, why bother?
Regarding end-fed multi-band wire antennas, I highly recommend Stephan’s (HB9EAJ) designs. The are simple to build, very thoroughly documented, and they work (see: A Portable 7-Band End-Fed Half-Wave Antenna; https://hb9sota.ch/hb9eaj/ ).
Portable vs *OTA Operations
I add this section as food for thought.
It may be heresy to write this here, but I’m not an *OTA person. I could never wrap my head around the arbitrary requirement for 10 QSOs to “validate” an activation (as well as all the tangle of spotting, submitting of logs to satisfy hunters/chasers, etc.). What is “invalid” about one QSO? My whole Mount Sylvester adventure was fun, instructive, and deeply satisfying with just one QSO.
Let’s examine this in historical context.
I live in sight of the Signal Hill National Historic Site in St. John’s, Newfoundland. At 12:30 on Dec. 12, 1901, Guglielmo Marconi, using a kite-borne random wire antenna at Signal Hill, received the letter “S” from a spark transmitter in Poldhu, Cornwall, England. Marconi later wrote:
“Shortly before midday I placed the single earphone to my ear and started listening. The receiver on the table before me was very crude — a few coils and condensers and a coherer — no valves, no amplifiers, not even a crystal. But I was at last on the point of putting the correctness of all my beliefs to test. The answer came at 12: 30 when I heard, faintly but distinctly, pip-pip-pip. I handed the phone to Kemp: “Can you hear anything?” I asked. “Yes,” he said. “The letter S.” He could hear it. I knew then that all my anticipations had been justified. The electric waves sent out into space from Poldhu had traversed the Atlantic — the distance, enormous as it seemed then, of 1,700 miles — unimpeded by the curvature of the earth. The result meant much more to me than the mere successful realization of an experiment. As Sir Oliver Lodge has stated, it was an epoch in history. I now felt for the first time absolutely certain that the day would come when mankind would be able to send messages without wires not only across the Atlantic but between the farthermost ends of the earth.”
So, Marconi launched the whole paradigm of wireless communication based just on receiving a single Morse letter – that is, based on half a QSO! I’d say he did rather well in creating an “epoch in history”, but his efforts would not satisfy *OTA requirements for an “activation”! …hmmm.
I’ll stick with “raw” portable operation – hike/fly/boat to some remote location, put up a portable antenna, turn the dial and listen, and see who I can work with a few watts – no spotting, no alerted chasers, no laptops, no cell phones. Those on the other end of portable QSOs are always interested to hear about everything – the rig(s), power source, antenna, location, etc. For me, one or two QSOs with meaningful exchange of info is far more satisfying than would be ten rushed “5NN TU” *OTA-type contacts.
I admit, I am not an awards-motivated ham; maybe you are and get a kick out of all the book-keeping and certificates. Fair play – the *OTA upsurge has certainly brought more hams back to QRP /P operations, especially CW, and I’m glad of that. My point is to not get cornered into thinking that modern QRP /P operation must be within some *OTA framework, where if you “don’t get your 10 contacts” somehow your efforts are a failure. Just remember, half a QSO changed the world! 
We all play radio to our liking – to each his own… It is a delightful luxury to have the freedom, health, wherewithal, and time to get outdoors, set up portable ham gear, and work the world, then fix, refine, build or acquire new gear, repackage, rinse and repeat… I take none of it for granted. How fun is ham radio!
Thanks for reading this article. I hope you enjoyed it!
72, Scott VO1DR
Saturday, July 29, 2023
An Austrian Analysis of Covid Vaccines - LewRockwell
Friday, July 28, 2023
A Primer on So-Called Tax Expenditures by Dan Mitchell
At the start of the year, I wrote that so-called tax expenditures were a “boring but important issue.”
Well, it’s time to once again put readers to sleep.
Let’s start with a definition. A tax expenditure is basically a loophole in the tax code. And these loopholes are called tax expenditures because they are seen as being equivalent to a spending program.
For instance, the crowd in Washington could pass a $100 billion spending program to benefit an interest group, or it could create a special preference in the tax code that is worth $100 billion to the same interest group.
Libertarians don’t view these things as morally equivalent. A spending program takes money from other people and gives those funds to an interest group, whereas a tax loophole simply lets people keep their own money.
But that does not mean tax loopholes are good policy. They are a form of industrial policy in the tax code.
The pro-market view is that loopholes should be eliminated so long as every penny of the revenue is used to lower tax rates (a core premise of tax reform).
This sounds simple and straightforward, but there is a big controversy over the benchmark (or “tax base“) that gets used when measuring loopholes.
- Is is the Haig-Simons tax base, which assumes that there should be double taxation of income that is saved and invested (in effect, taxing income plus changes in net worth)?
- Is is the consumption tax base, which assumes that income should be taxed only one time (thus creating neutrality between current consumption and future consumption)?
Official Washington (primarily the Treasury Department and the Joint Committee on Taxation, but also CBO, GAO, ) uses the Haig-Simons tax base.
And left-leaning groups understandably like the Haig-Simons approach.
Needless to say, pro-market organizations have a different perspective.
Chris Edwards has a new study that reviews the official list of tax expenditures and identifies which ones actually are loopholes.

The Tax Foundation did something similar back in February.
Here’s a table showing how so-called expenditures dramatically shrink when getting rid of tax penalties on business investment and tax penalties on personal savings and investment.

For those who want to finance genuine tax reform, there are genuine loopholes that could be eliminated or curtailed, most notably the fringe benefits exclusion and the muni-bond exemption.
P.S. The fringe benefits exclusion is such bad policy (contributing to third-party payer) that I even wrote something nice about Obamacare.
P.P.S. Our friends on the left genuinely seem to think that the government has an automatic claim to people’s income.
Product Spotlight: A Range of Devices that Can Help You Win the Fight Against QRM Posted by OnAllBands
In an earlier July post, we talked about the rise of DQRM—deliberate human-generated noise often employed by bad actors during rare activations. While there are many opinions on this problem, it’s safe to say everyone agrees that we’d all be better off if those who are intentionally spoiling the fun of DXing simply found another hobby—perhaps pickle ball or stamp collecting. For those unintentionally disrupting pileups through poor operating practices, we encourage you to find a local Elmer who can steer you in the right direction.
For hams living in areas that are already disrupted by interference from human-made sources, adding DQRM to the mix can turn time on the air into an unpleasant experience. DX Engineering is proud to carry a range of devices to mitigate QRM and QRN issues. Here are a few:
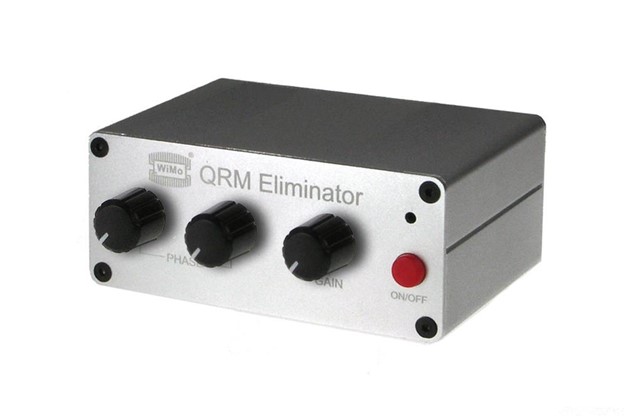
DX Engineering is the exclusive North American retailer of a device that numerous hams say has made a genuine difference—the QRM Eliminator 26000 from WiMo.
But first, a few clarifications.
QRM is distinguished from QRN, which stands for natural interference like static caused by electrical storms. Separating the terms QRM and RFI (radio frequency interference) is more complicated. One explanation says QRM (one of ham radio’s longstanding Q-codes) refers to noise produced by another transmitting ham, while RFI applies to human-made noise that comes from something other than a transmitter. Others say QRM refers to human-made noise in general regardless of the source. Some operators, in the heat of a pileup, may simply eschew acronyms and Q-codes and describe the interference in saltier language not appropriate for this blog. If this means you, it’s time to consider making a smart investment in a noise-canceling upgrade.
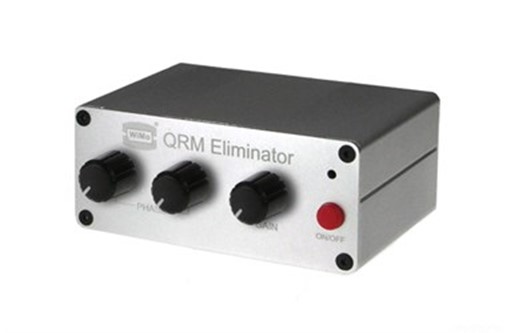
About WiMo’s QRM Eliminator
The QRM Eliminator is a simple signal phasing device billed as a tool for effectively reducing or removing noise interference for dramatically improved HF reception. WiMo states that the unit is based on an innovative concept and should not be compared with the performance of noise blanker or DSP circuits. The idea is to remove noise generated from offending local electrical system hardware and other electronic sources before it gets to the receiver. This local receive interference can come from a range of culprits, including high-tension power lines with bad connections, broken insulators, TV and monitor screens, computers, dimmers, low-voltage lighting, and so on.
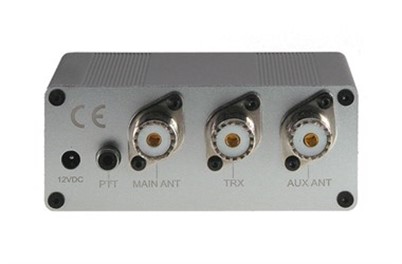
WiMo says the QRM Eliminator can get rid of local interference—weather from your own station or an electronics device hundreds of feet away—almost entirely, up to an S9 level, resulting in the likelihood of completely clear reception. It works regardless of whether or not you know the source of the noise. The device connects to the antenna port of the transceiver and to the antenna (or amplifier input) without any radio modifications required. An additional user-supplied auxiliary receiving antenna is required, such as a properly positioned eight-foot outdoor dipole antenna or a simple 20-foot wire in the shack, for example. This “noise sense” antenna receives mostly unwanted signals, while the transmitting antenna receives the same interference in a different phase along with the desired signal.
The QRM Eliminator allows the adjustment of the amplification and phase to cancel out the unwanted signal before it reaches the receiver front end. Noise or interference nulling can provide over 45 dB of unwanted signal suppression, in many cases resulting in clear reception of the desired signal. The device comes with a 2.1mm power cable assembly with the other end unterminated for connection to your power supply.
What do hams say about the QRM Eliminator?
Five Stars: “I’ve had a QRM problem at my QTH for a couple of years. This device is the answer. I had two bands that were unusable and now they all play very well. I highly recommend this product if you live in a neighborhood with electrical noise; mine is a hashy sounding static that I believe comes from a newly constructed building near my house. The noise level on 12M and the low end of 80 was over S9. I can almost eliminate it, getting it down to about S3.”
Next on our list are MFJ’s Noise Canceling Signal Enhancers,sold in regular (MFJ-1025) and deluxe (MFJ-1026) models. These units are designed to reduce noise or interference, or improve desired signals, before the noise affects sensitive receiver circuits. They are optimized over the range of 1.8 to 30 MHz and contain the interface circuitry necessary for operation with most modern HF transceivers. These MFJ units feature exceptional phase amplitude flatness, making adjustments easy and enabling users to null out interfering signals or peak desired signals with the adjustment of a few controls. Although these signal enhancers contain internal RF sensing for T/R switching, MFJ strongly recommends using the external T/R control connector on the rear panel for keying. These units run on 12 Vdc or 110 Vac with an optional adapter, sold separately.
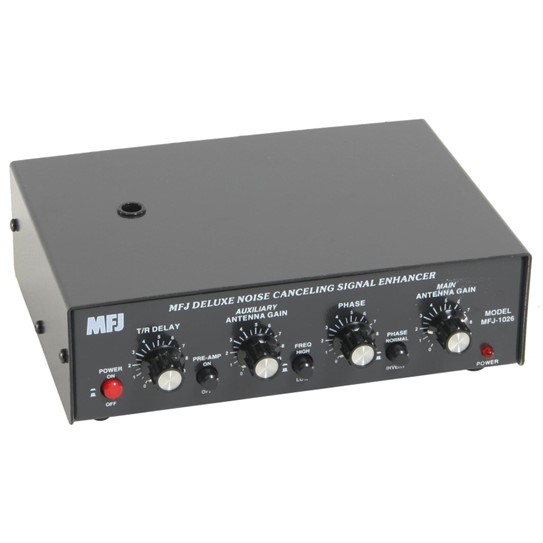
What do hams say about the MFJ Noise Canceling Signal Enhancer?
Five Stars: “I performed a considerable amount of research on this product prior to purchase. All the reviews were so positive. So, with my noise problem being unbearable on all bands, what did I have to lose? All I can say is WOW. Takes the noise level and drops it to nonexistent. I never thought I would see any relief from the 20dB noise with a ‘magic box.’ Made great use of it over the holidays. Would recommend it highly!”
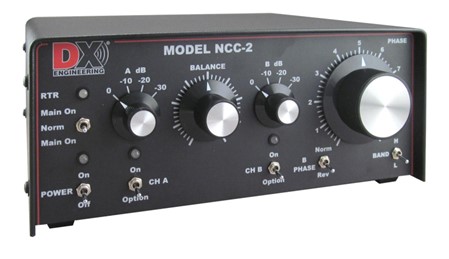
For hams who want to take noise cancelation to the highest level, we recommend the DX Engineering NCC-2 Receive Antenna Phasing System. We’ll let this satisfied customer explain why this device sits at the top of our list:
Five Stars: “Very good product. Good value for the price. I usually do not review this early on after purchasing a product, but the NCC-2 thus far is a very potent tool against RFI noise that over several months had kept me from operating. Attempts were made with the power company and our searching locally for the source of the severe noise to no avail. I am using the NCC-2 with two W6LVP loops spaced 20 feet apart with rotors. Not only can the severe noise be nulled or removed, but signals can often be peaked also. Got severe local generated noise that can’t be resolved? This is the product to remedy it!”
This 300 kHz-30MHz variable phasing controller combines the received signals from one transmit antenna and one receive antenna, or from two receive antennas. By combining two stationary antennas, an array pattern is created with signal peaks and dips. Adjusting the phase control has the effect of electronically rotating or steering that pattern. Steering the null direction to significantly weaken an interfering signal or noise, local or distant, can dramatically enhance the reception of weak signals from other directions. Having this “reverse-beam” capability on low frequencies, AM Broadcast through HF, can provide amazing benefits for many types of operating.
If you’d like to also use your radio functions to help dig out weak signals and reduce interference, read this OnAllBands article from blogger Mark, K8MSH, “How to Use RF Gain, Noise Blanker, and Other Transceiver Features to Improve Copy.”
Bearvault BV425 Bear Canister Review by Philip Werner
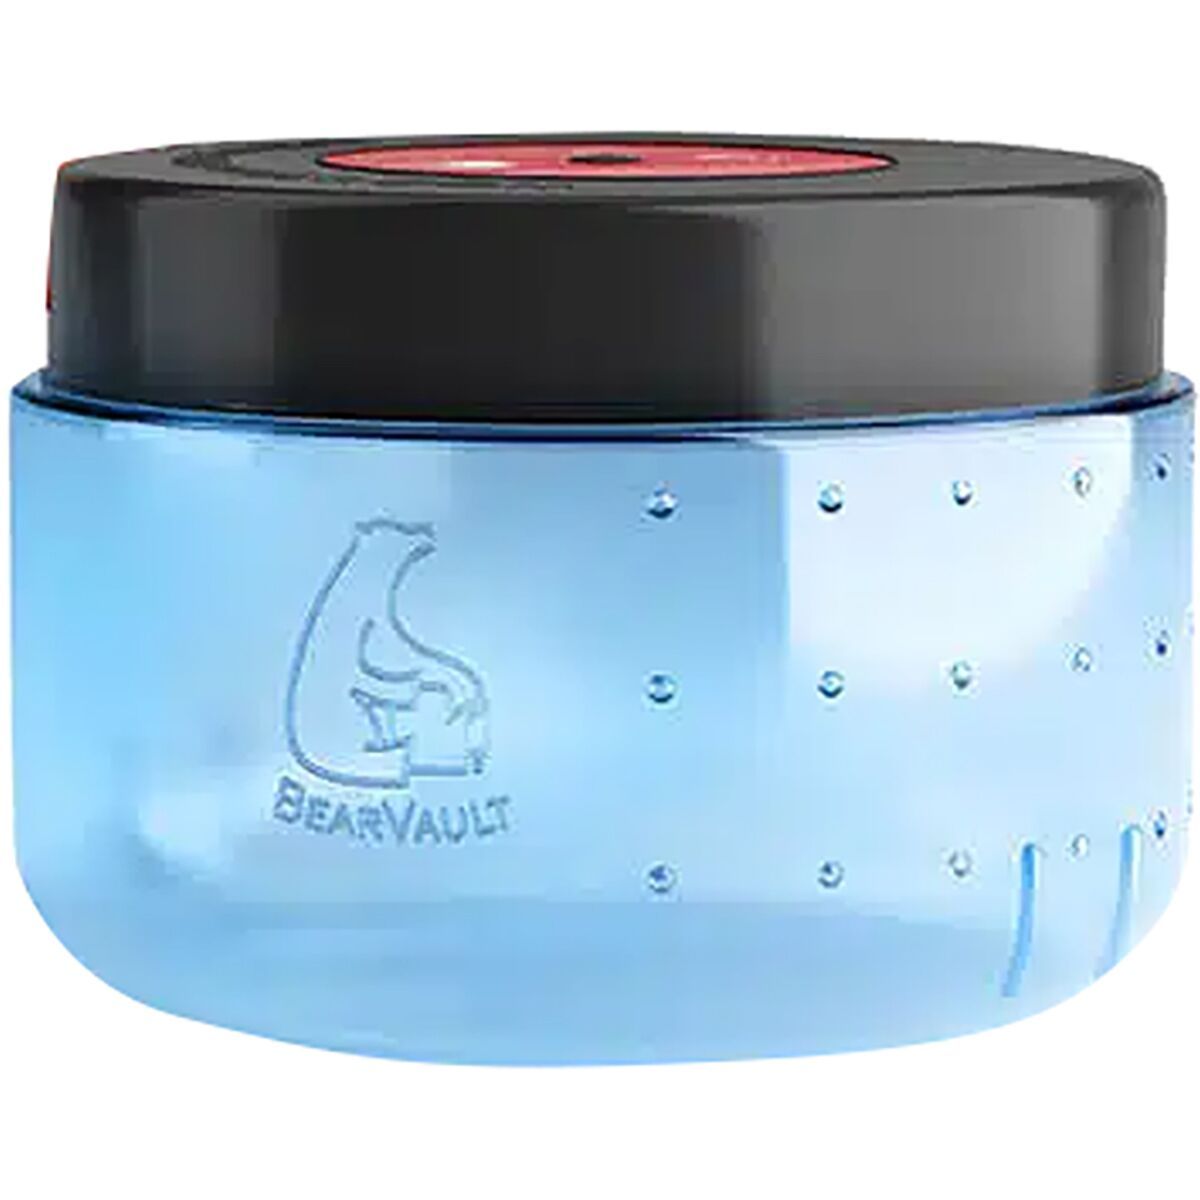
The BearVault BV425 is a 1 lb 12 oz (800g) bear canister capable of carrying 2-3 days worth of food. It has an internal capacity of 305 cubic inches (5 liters). The canister is made of durable polycarbonate. The BV425 has an opening with a diameter of 7” which makes packing and organizing your food easy, and being transparent, it’s pretty easy to find what you’re looking for and to know how much food you have left.
Specs at a Glance
- Volume: 305 cubic inches, 5 L, (2-3 days)
- Tool-Free Operation: Yes
- Material: Clear polycarbonate
- Weight: 1 lbs 12 oz (800g)
- Dimensions: 8.7″ x 6″
- Diameter of opening: 7″
- Approvals: IGBC
BearVault also makes several other canister sizes, the BV450, BV475, and BV500, but the BV425 is optimal for short backpacking trips in areas where a bear canister is required because it’s easy to pack inside your backpack. I pack mine in the middle of my pack, just above my sleep insulation, and shim out the sides with loose clothing. It’s that small.
| Make / Model | Weight in oz. | Cubic In | Days Food |
|---|---|---|---|
| Bare Boxer | 26.3 oz | 275 | 3 |
| BearVault BV425 | 28 oz | 305 | 3 |
| BearVault BV450 | 33 oz | 440 | 4 |
| BearVault BV475 | 36 oz | 565 | 6 |
| BearVault BV500 | 41 oz | 700 | 7 |
I started using the BV425 this summer for the 1-2 night backpacking trips I like to take in the White Mountain National Forest, where you have to either hang your food (12 feet up and 6 feet out), use a bear canister, or one of the bear boxes available at designated tent sites. Unfortunately, Ursacks are no longer permitted in the Whites.

Advantages
While hanging your food in the Whites is a lightweight option, it can be difficult and rather time-consuming to do. Moreover, a small bear canister like the BV425 has a lot of advantages over hanging a bear bag in a tree. For example,
- It is impervious to mice and small rodents.
- Requires no skill to hang or tie knots.
- Bear canisters can be stored on the ground.
- A bear canister is easy to stash (preferably 200 feet from your campsite), even after dark.
- Easy to clean.
- Fits inside ultralight backpacks easily.
- You can sit on it as a camp stool.
If you’ve ever spent an hour or more trying to hang a bear bag at the end of the day or as dark approaches, those are pretty significant advantages.

Locking mechanism
The BearVault BV425 has a black screw-top lid. There are two little locking tabs on the lid which are sloping on one side so they can pass through the locking tab on the canister when screwing on the lid. They are blunt on the other side so they will not pass back through the locking tab until you forcibly depress them. To unlock the canister, push in the tabs on the lid until they clear the tabs on the canister and unscrew the lid in one motion. It takes a couple of tries, but you get used to it pretty quickly.
Competition: The Bare Boxer
I also own another small bear canister, called the Bare Boxer, which has close to the same volume as the BV425. While it is slightly lighter weight, I like the BV425 because it has a much wider top opening (7″ instead of 4.75″ on the Bare Boxer), it doesn’t require a tool to open, and it’s easy to see how much food you have left inside.
Recommendation
The BearVault BV425 bear canister is a great option for short backpacking trips up to 2-3 days in length if you know you will be backpacking in places where bear canisters are required. Its small size means that you can easily pack it inside your backpack and you can stash it on the ground at night, even if you get to camp after dark when hanging a bear bag in a tree would be virtually impossible.
Disclosure: Bearvault donated a bear canister for review.
Compare 3 Prices

$81.00$73.50VIEW
 $76.95VIEW
Amazon.com Price: $76.95 (as of 07/27/2023 21:28 GMT-0400) Details
 $76.95VIEW
