Wednesday, July 16, 2025
US Radio Orienteering Champs Crowned from https://www.arrl.org/
07/07/2025
The 24th USA Radio Orienteering Championships were held June 19 – 22, 2025. The event was hosted by the Backwoods Orienteering Klub (BOK) at Morrow Mountain State Park in Albemarle, North Carolina, and drew about 30 athletes from across the United States and Canada. Radio orienteering is also known as amateur radio direction-finding, or ARDF.
There were four World Championship-style races: Foxoring, Sprint, 2m Classic and 80m Classic.
The Elite results:
- Eduard Nasybulin (Massachusetts), unofficial overall crown, dominated the men’s field, winning Sprint, 2m and 80m Classics, and adding silver in Foxoring.
- Gheorghe Fala (North Carolina/BOK) seized Foxoring gold and finished second to Nasybulin in 2m and 80m Classics.
- In W35 (women ages 35 and older), Lori Huberman (California Bay Area Orienteering Club) captured Foxoring and Sprint, while Erin Hammer (NC/BOK) sprinted to 2m and 80m Classics gold and added silver in the other formats.
Masters stand-outs:
- Nadia Scharlau, KO4ADV (North Carolina/BOK), extended her W55 (women ages 55 and older) legacy with victories in both 2m and 80m Classics.
- The M60 class (men ages 60 and older) became a two-way battle: Evgeny Danilov, KQ4QYZ, and Nicolai Mejevoi traded wins and podium spots across all four events, with Mejevoi topping the Sprint and 80m Classic races while Danilov took 2m Classic and Foxoring gold.
Senior competitors:
Every entrant in the M70 (men 70 and older) and W75 (women 75 and older) divisions completed at least three of the four demanding courses. Their steady performances — and obvious enjoyment — underscored the value of adding senior categories to future championships.
Youth sweep:
BOK junior Tiger Zhao claimed a perfect four-event sweep in M16 (men 16 and under) and teammates Anastasia Afonkin W16 (women 16 and under) and Adalia Schafrath-Craig W19 (women 19 and younger) also took golds — some with times that would have placed competitively in older divisions.
Team USA will go on to compete at the 2025 IARU World Championships, to be held in Lithuania in August. The complete results of these championships, available at the BOK website, will be used for selecting the US team. Learn more about amateur radio direction finding on the ARRL ARDF page.
Tuesday, July 15, 2025
How to Prevent and Treat Blisters Written by Thaddaeus Welch
I’ve hiked thousands of miles across the Appalachian Trail, Pacific Crest Trail, and Continental Divide Trail, without a single blister. However, it took some dialing in on my backpacking trips prior to the Triple Crown to figure this out. In this article I am going to share with you what I’ve learned about blister prevention so you too can be blister free. First and foremost, blister prevention is the best blister treatment.
There’s nothing worse than watching an incredible day on trail turn into a painful slog because of blisters, but the good news is that they’re entirely avoidable. With the right preparation and habits, you can keep your feet happy and blister-free. And if a blister does start to form, knowing how to treat it can mean the difference between increasing the pain or aiding your body in the healing process.
Why Do Blisters Form?
In order to prevent blisters it is important to think like a blister and understand why and how they form. Blisters form as a protective response to friction, heat, or moisture that damages the skin. When the skin is rubbed repeatedly against a surface, it can cause the outer layer to become irritated. The body responds by sending fluid to the affected area, causing a small pocket of fluid to form between the outer skin layer (epidermis) and the deeper layers (dermis). This helps cushion and protect the damaged tissue underneath.
Blisters often form on areas of the skin that are exposed to repeated friction. Moisture, such as from sweat, can exacerbate this friction, increasing the likelihood of blisters. The blister prevention and treatment methods in the article explain how we can better assist our bodies in either stopping blisters from forming or aiding in healing blisters.

Choosing the Right Footwear
The foundation of blister prevention is choosing the right hiking footwear. If your footwear doesn’t fit properly, you and your feet will suffer. Before you buy, check out this guide on how to choose hiking boots. Make sure your footwear has enough room for your toes to move but not so much space that your feet slide around. Breaking in boots before hitting the trail is crucial – wear them on short hikes, around town, and as your daily drivers to soften the material and mold them to your feet. Stiff, unworn boots can create pressure points and cause blisters early in a hike.
Personally, I’ve found that trail runners are a much better option than traditional hiking boots for long distances. They are lightweight, breathable, and require little to no break-in period. The increased airflow also keeps feet dry, reducing the moisture buildup that contributes to blisters. If you’re hiking thousands of miles or just prefer a more comfortable, flexible shoe, trail runners might be the way to go.
Socks are just as important. Avoid cotton, which traps moisture and increases friction. Instead, go for moisture-wicking materials like merino wool or synthetic blends. I always use a two-layer sock system: a thin liner sock under a thicker hiking sock to reduce friction. Using toe socks as liner socks has been a key blister prevention strategy for me, without them I will get blisters between my toes, with them I do not.
Gaiters are another piece of gear I won’t hike without. They keep dirt, sand, and small rocks out of my shoes, which means fewer friction points and blisters. Even tiny bits of debris inside your footwear can create hot spots that turn into painful blisters by the end of the day.

KnoW Your Feet
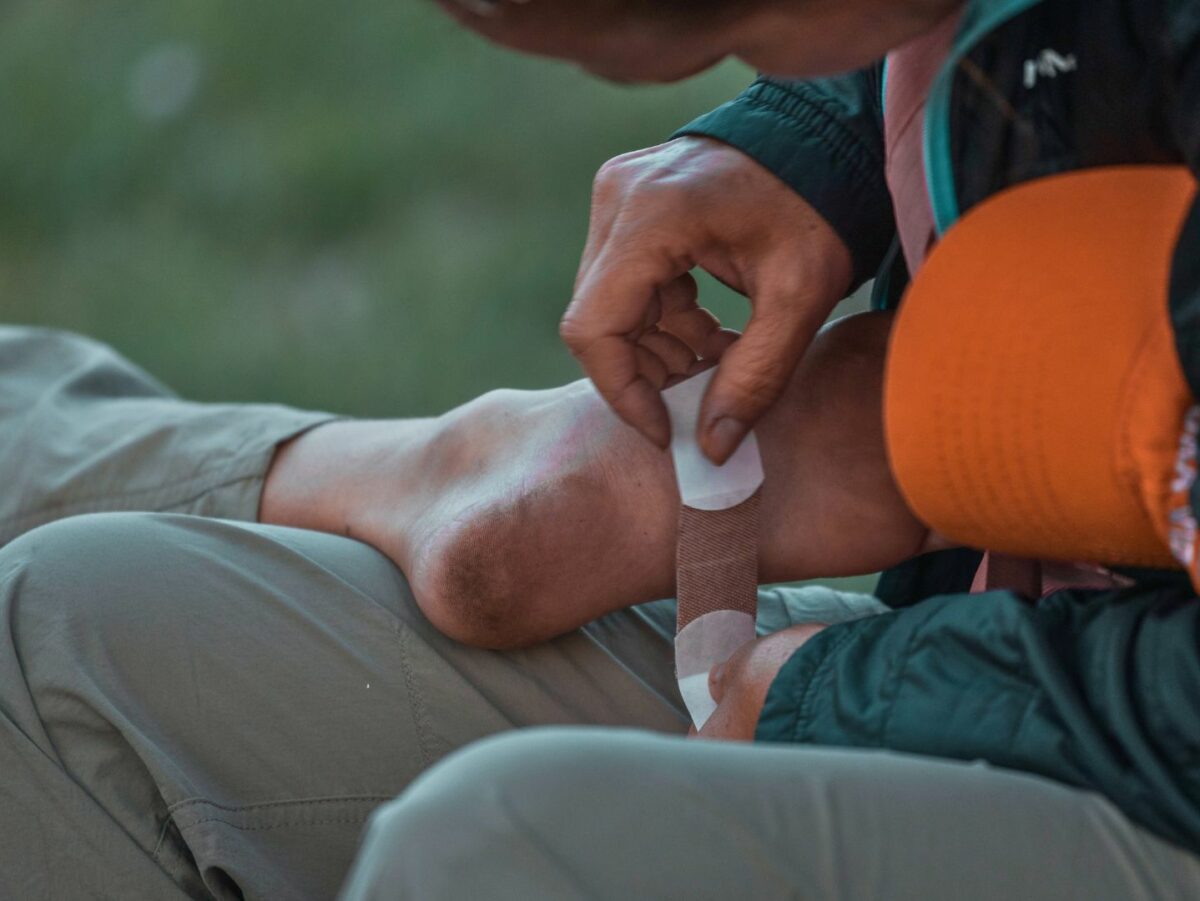
After thousands of miles on trail, I know exactly where my feet tend to blister – between my toes, and I prevent blisters there by wearing a liner toe sock. If you know your weak spots, be proactive. You can also pre-tape these areas with Leukotape or moleskin for extra protection. Leukotape is the most superior product I have ever discovered when it comes to a dressing that will not come up until you want it off.
Trimming toenails before a hike is also crucial. Long nails can press against the front of your shoe, causing discomfort and even black toenails (which, trust me, is worse than a blister). Keeping your feet dry is another big one—whenever I stop for a break, I take my socks and shoes off to let my feet air out. This is especially important in wetter climates and will aid in preventing trench foot.
One of the best natural defenses against blisters? Calluses. Over time, your feet will build up thickened areas of skin in high-friction spots, acting as a protective barrier. I never shave them off completely, but I do keep them smooth with a pumice stone to prevent cracking, which can cause other problems down the road.
Recognizing and Addressing Hot Spots
A hot spot is an early warning sign of a developing blister. It presents as a slight irritation or burning sensation, often caused by friction in a specific area of the foot. Addressing hot spots immediately is a key step in effective blister prevention.
To manage a hot spot:
- Cover the affected area with Leukotape or a blister prevention patch to reduce friction.
- If those materials are unavailable, a piece of duct tape can serve as a temporary solution but should be taken off as soon as possible.
- Adjust socks and shoes to minimize continued rubbing.
- Take a break and allow feet to breathe if the situation permits.
Ignoring a hot spot increases the risk of blister formation. A few minutes of proactive care can prevent significant discomfort later on.
Treating a Blister on the Trail
Even with the best blister prevention strategies, sometimes blisters still happen. How they are treated depends on the situation.
If the Blister is Intact:
- If it is small and not causing pain, it is best to leave it alone.
- Covering it with Leukotape or a blister pad after cleaning will help protect it from further friction.
- On a multi-day hike, reinforcing it with tape for the remainder of the hike can prevent bursting.
If the Blister is Large or Painful:
- Clean the area with an antiseptic wipe.
- Using a sterilized needle (can be done with a lighter) or safety pin, puncture the side and drain the fluid, but leave the skin intact to protect the raw area underneath.
- Apply antibiotic ointment and cover with a bandage, gauze, or blister pad.
- Secure everything with tape to keep it in place.
If the Blister is Infected:
- Signs of infection include redness, warmth, pus, or increasing pain.
- Keep it clean, apply antibiotic ointment, and change dressings frequently.
- If symptoms worsen, seek medical attention as soon as possible.
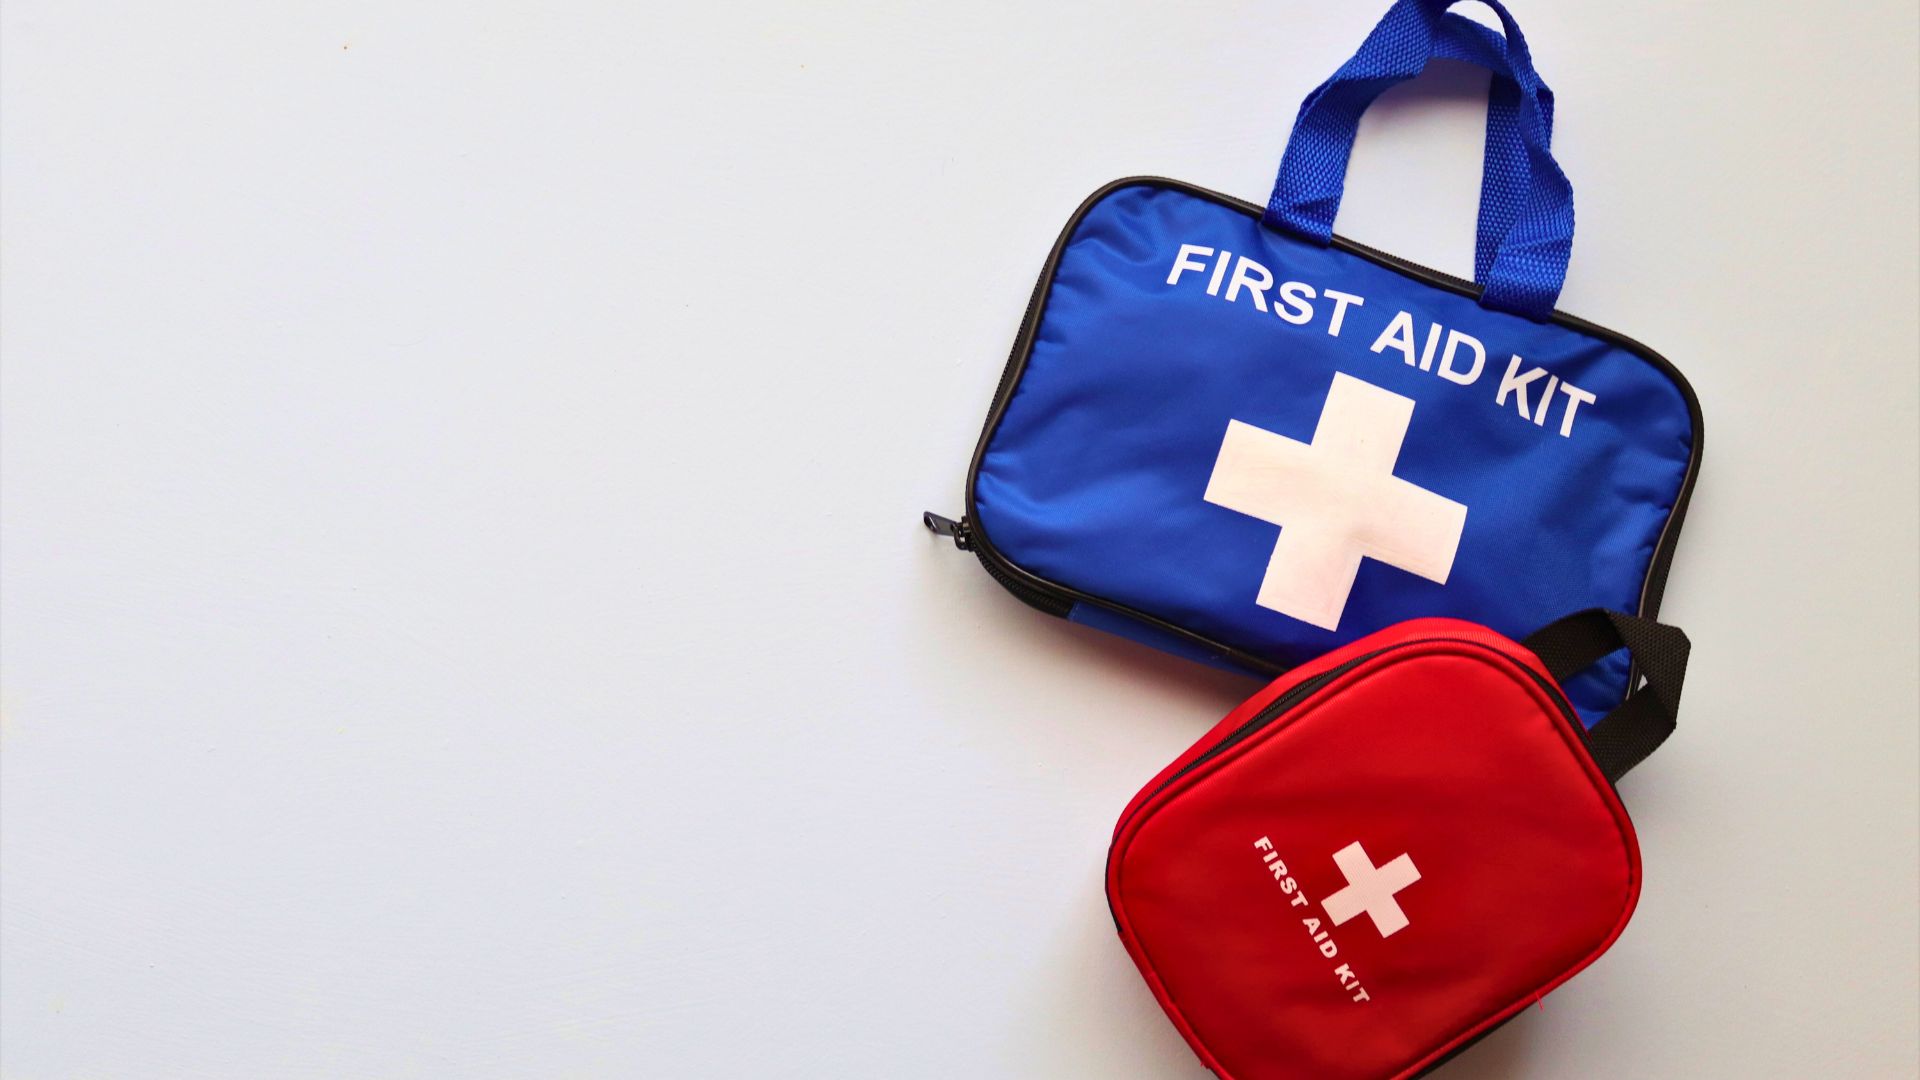
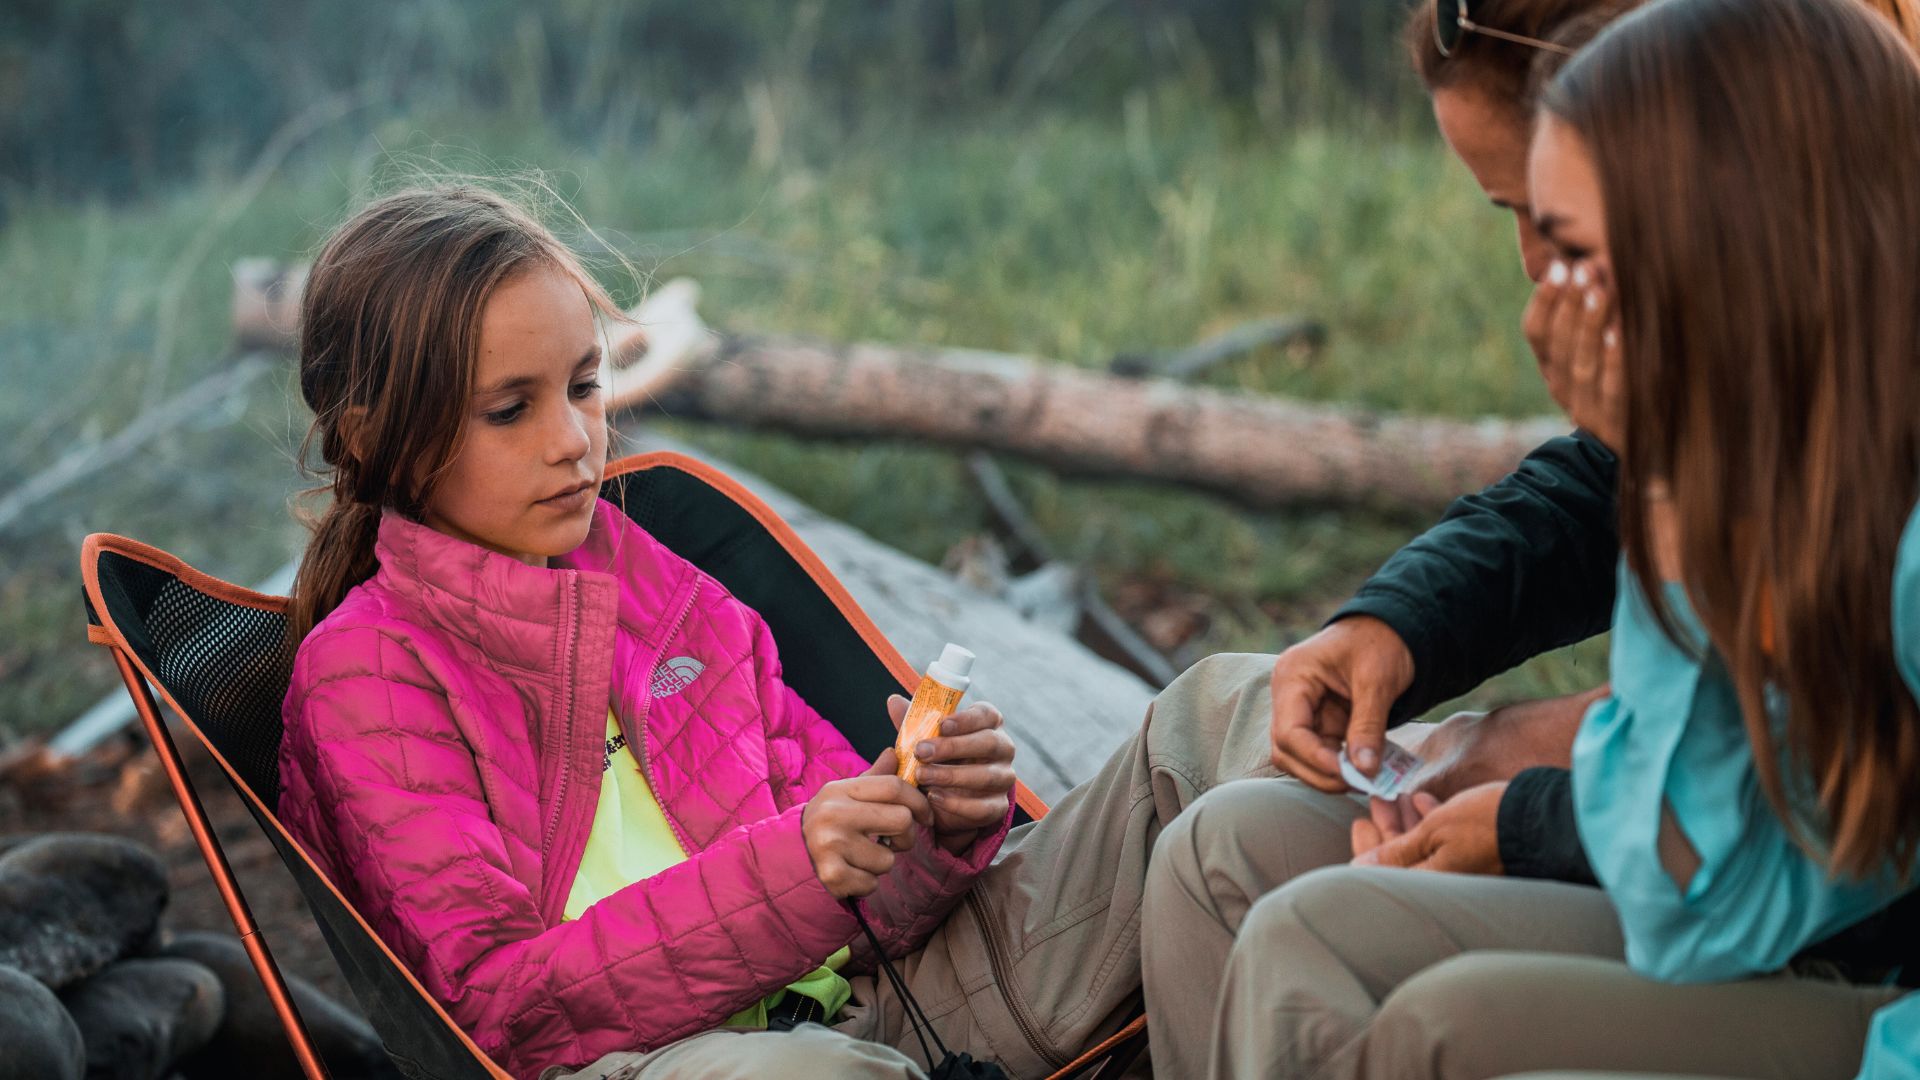
Building A Med Kit for Blister Treatment
An ideal blister treatment kit would contain:
- Leukotape – and it is useful for more than blisters.
- Antiseptic wipes or alcohol pads
- Antibiotic ointment
- Safety pin or needle (sterilized when draining blisters)
- Small scissors (to trim tape or bandages)
- Gauze
- Extra pair of dry socks
This kit can be made quite light, and many of the items will be able to serve multiple purposes.
Prevention is the Best Cure
Blister prevention isn’t just about comfort—it’s about keeping yourself moving. Whether it’s choosing the right footwear, managing moisture, or catching hot spots early, the little things make a big difference. But if a blister does form, knowing how to treat it will keep you hiking instead of hobbling.
After thousands of miles, I’ve learned to respect my feet. They’re what carry me through every adventure, and taking care of them means I get to keep hiking. If you do the same, you’ll set yourself up for success, whether it’s a weekend backpacking trip or a multi month-long outing.
Seattle’s Tax Experiment Backfires July 15, 2025 by Dan Mitchell
Economists are lousy forecasters, at least when they try to make specific predictions.
But good economists at least can speculate about whether proposed policies will make things better or worse.
 For instance, Ronald Reagan had the good fortune to study economics at Eureka College and he was wise enough to make this universally applicable observation about tax policy.
I try to follow Reagan’s approach.
As such, when politicians in Seattle were enacting a payroll tax back in 2020, I didn’t make any cataclysmic estimates of job losses.
Instead, I wrote that, “…it’s easy to predict the consequences. Businesses and workers will migrate to surrounding communities without the tax. Not all of them, of course, but enough to make a difference.”
Well, it seems I was right.
Here are some excerpts from a March report by Julia Dallas.
Seattle Mayor Bruce Harrell released his payroll expense tax (PET) report for 2024 on Tuesday and its projections came up nearly $50 million short. …The Association of Washington Business, Bellevue Chamber of Commerce, Seattle Metropolitan Chamber of Commerce, and Washington Roundtable released a joint statement, saying the numbers are as expected.
…The payroll tax is levied on large corporations in the city, like Amazon and Expedia. Such a steep revenue forecast error suggests high-paying companies or their jobs are leaving the city. …KTTH host Jason Rantz called the news “catastrophic”… “What people haven’t realized yet—but soon will—is that the sharp drop in payroll expense tax revenue means jobs are leaving Seattle,” Rantz explained. “The whole point of the PET was to squeeze ‘free’ money out of businesses because the city arrogantly assumed it held all the cards. But what did PET actually do? It pushed Amazon jobs to Bellevue, kept employees working from home (and out of Seattle), and helped fuel layoffs at companies hit hardest by the tax—like Expedia.” …Even Harrell acknowledged, “This decrease in revenue is aligned with recent reports of major employers moving thousands of high-paying jobs out of Seattle to other cities in our region.”
I reckon we should be grateful for Seattle’s greedy and misguided lawmakers.
Like their colleagues in other cities (Philadelphia, Chicago, Berkeley, Vancouver, and Washington, DC), they have produced an excellent case study about supply-side economics.
The Philoso-Raptor understands the implications, but are our friends on the left similarly astute?
For what it’s worth, I think many statists are bright enough to grasp the economics, but they don’t care.
They’re motivated by spite and envy, not economic reasoning.
Or they are practitioners of “public choice,” meaning they will do whatever leads to short-run political benefits, even if means bad long-run policy.
P.S. Seattle conducted another tax-hike experiment and got similar results.
Trump’s Epstein Problem - LewRockwell
Monday, July 14, 2025
An Outside the Box version of the Delta Loop antenna John VA3KOT
I have written about delta loop antennas before – notably in April 2023 in a post entitled “Delta Loopy Ideas“. A few weeks ago I received an email from Alan WA3EKL who suggested I should take another look at delta loops and offered a lot of helpful advice, tips and suggestions for making this type of antenna a success. Alan’s suggestions have been a tremendous help in designing this latest iteration of my rapid deployment, field expedient, portable delta loop antenna for the 20m band.
Before we go on to describe what is definitely an “outside the box” variant of the delta loop I should comment that I remain welded to the idea that delta loops can be tricky to set up. There are so many variables to consider:
- orientation (apex up, down or sideways)
- feedpoint (at the apex, at a corner, a quarter wave from the apex or somewhere in between) giving horizontal or vertical polarization
- loop length (1005/frequency or some other length, bare or insulated wire)
- equilateral triangle (or not)
- height of wire above ground
- Matching device (quarter-wavelength 75 ohm coax / impedance transformer / L-network / tuner)
On the positive side you can simplify all the variables and just throw up an “inside the box” version. You will make contacts – but will the standard, don’t-bend-the-rules version of a delta loop be as efficient as possible?
My personal quest has been to find an antenna that is efficient enough to let me carry on working QRP during the Sun’s current spate of hissy fits. With that in mind I wanted to experiment with the variables to see if every last picowatt of RF energy could be transferred from my humble, so-small-its-hard-to-see-without-a-lens QRP-Labs QMX transceiver to the ionosphere via whatever variant of the delta loop became necessary. I have a muscle radio that could get the job done, but there is an engineering and physics challenge built into this quest. Part of the challenge of QRP is to use brains over brawn.
So let’s examine those design variables and see what emerges from the mist. First up:
1. Orientation (apex up, down or sideways)

There are arguments to be made for and against each way of orienting the loop – and let’s emphasize that we are discussing only vertical orientations here. This is not meant to be a treatise on the basic theory of delta loops, so let me just state that only one orientation fills my needs. The use case we will discuss here is a rapid deployment, field expedient, portable antenna. The antenna must be lightweight, pack into a very small space and will remain erected for perhaps only an hour – just long enough to complete a POTA activation.
The orientation that fills this need is an apex up triangle supported by a telescoping fiberglass pole (a 7m Spiderbeam) at the center. Each end of the bottom section of the loop is supported by a modified trekking pole stuck in the ground.
The Spiderbeam pole could be omitted if a tree limb is available for the center support. A fence or bush could replace the trekking poles. I prefer to be self-sufficient out in the Big Blue Sky Shack and not depend on whatever might be available at the end of the trail. Trekking poles can also be used for their intended purpose en route to the operating site.
2. Feedpoint

A delta loop can be fed at the apex, at a corner, a quarter wave from the apex or somewhere in between. I chose to feed my loop at a corner for convenience. The choice of feedpoint affects whether the radiated signal is vertically or horizontally polarized. Frankly, I don’t care; the radiated signal is going to be fired up to the periphery of the “Final Frontier” where it will be kicked around by the ionosphere’s D-layer, then refracted back down to Earth with who-knows-what polarization. We might be more concerned at, say, a Field Day site where it might be desirable to chose vertical or horizontal polarization to avoid interference in the near field with other stations.
3. Loop length

Those who don’t wish to rock the boat of antenna orthodoxy will just cut their wire using the formula 1005/frequency. Should the wire be bare or insulated? Does it matter? Some sources say absolutely not. Other sources suggest the effect of insulation is finite, but insignificant.
I decided to consult the stone tablets to get an official view of the effect of wire insulation. First I consulted the EZNEC manual in which EZNEC creator Roy Lewallen W7EL suggests the difference between bare and insulated wire is very small – perhaps 2-3%. EZNEC allows users to specify wire insulation in its calculations. If we consider that a 20m delta loop has a nominal wire length of 71.5ft, even a 2% impact could change the wire length by almost 18 inches. Significant? Perhaps not, but when I explain how I derived the wire length of my Outside the Box delta loop you may understand how my thinking was swayed on this issue.

One source may not be enough to establish a rule, so I also consulted the excellent website portable-antennas.com from Rob DM1CM. Modeling a delta loop on that site was a simple exercise of selecting various drop-down selection boxes – fast and easy. Portable Antennas.com also allows wire insulation to be calculated into the loop design. After plugging in the numbers for my loop the model gave a correction factor of 0.9754 when insulated wire is used. Based on a 71.5ft loop length that would suggest a shortening of 1.76 feet even using just a 2% shortening factor.
How did I determine my loop length? I made the decision to choose the loop length by trimming the wire until I obtained resonance in the CW QRP portion of the 20m band. I set my RigExpert AA55 Zoom antenna analyzer to plot an R,X (Resistance and Reactance) chart. The wire was then trimmed until the RigExpert showed an X value of zero. The wire length? I laid the wire out on the lawn I had neatly cut the day before and measured the length – it turned out to be just 68 feet. If the shortening factor of the wire insulation is taken into account the corrected length would be between 69.36 and 70.1 feet. Is that significant? Perhaps; if the resonant frequency were changed by 2% it might no longer lie in the desired part of the band.
4. Equilateral triangle? Height above ground
Ideally a loop antenna should enclose as much area as possible (source: well, I read it somewhere). My design was influenced by two factors – the height of the Spiderbeam pole (7m, 23ft) and the recommended height of the bottom section of wire above ground (source: Alan WA3EKL recommended between 4 and 6 feet; I chose 4 feet). So the Outside the Box variant of a delta loop is not an equilateral triangle. The bottom section of the wire (the hypotenuse) is longer than the other two sides. Less efficient than an equilateral triangle? Piff!
5. The matching device
Alan WA3EKL suggested a quarter-wavelength section of 75 ohm coax to match the impedance of the loop to 50 ohms, but cautioned against the use of foam dielectric coax whose velocity factor can change over time which affects its electrical length. The only 75 ohm coax I had available is RG-6 which has foam dielectric so I ruled that out.
I recently watched an interesting YouTube video by Michael KB9VBR, who was discussing his way of matching a delta loop antenna. Michael used an impedance transformer with an impedance ratio of 2.5:1 (8:5 turns ratio). That seemed like a convenient and field expedient way of matching the delta loop impedance of 100-120 ohms to 50 ohms so I built one. Out in the antenna test range (my backyard) it was discovered that a 2:1 ratio worked best (turns ratio 7:5).
The final result
My Outside the Box delta loop antenna is resonant at 14168 KHz (slightly higher than planned, but not a problem). The minimum SWR is 1.03:1 at 14175 KHz. At the lower band edge at 14000 KHz, the SWR is 1.15:1 and at the upper band edge of 14350 KHz, the SWR is 1.11:1. And, yes, I have made contacts with it. I bent the rules but the end result is worthy of making the trip to the field this summer.

Help support HamRadioOutsidetheBox
No “tip-jar”, “buy me a coffee”, Patreon, or Amazon links here. I enjoy my hobby and I enjoy writing about it. If you would like to support this blog please follow/subscribe using the link at the bottom of my home page, or like, comment (links at the bottom of each post), repost or share links to my posts on social media. If you would like to email me directly you will find my email address on my QRZ.com page. Thank you!
We Done Good: The KX1Q 2025 ARRL Field Day After Action Report With Updated Equipment Checklist & Station Block DiagramJuly 13, 2025 by KM1NDY
OVERVIEW
After several years of helping coordinate club Field Day events, AA1F and I set off to tackle 2023’s ARRL Field Day by ourselves. We squeaked out 264 contacts, but still had a great time.
By 2024, KX1Q was back on the air at our farm for Field Day in Upstate New York. This time, we thought it was a tremendous success, despite the fact that the weekend consisted of back to back thunderstorms. We made 362 contacts, 206 of which were AA1F’s. We vowed to hit 500 QSOs this year.
Anyone who reads this blog knows that AA1F and I are portable operators with Summits-On-The-Air (SOTA) being our primary radio activity. We of course have also participated a lot in the Parks-On-The-Air (POTA) program. Six years ago, these activities were fairly novel. But these days, POTA in particular is dominating the ham radio hobby.
It is easy to see the draw of portable radio — a hobby traditionally seen as the domain of nerdy introverts has instead become a gateway of great outdoor adventures. And it seems to me the more the “make every day field day” mentality embeds itself into radio amateurs, the less importance is assigned to the actual ARRL Field Day. But is it true that the rise of POTA has diminished Field Day? Are POTA and Field Day the same actual operating experiences? I strongly do not believe they are. I would go on even further to argue that being a good POTA operator does not translate into being a good contester. And Field Day, amongst its other roles, is indeed a contest. Or at least a contest-style event if you prefer. In fact, to really punch hard, I do not think POTA operators are very good at Field Day at all.
In POTA (or SOTA), you park yourself on a frequency and then tell the world where you are via a spotting app. The chasers then come find you, often in bulk. One of the last POTAs I did, I made 122 contacts is 1 hour and 35 minutes. Contrast that to last year’s Field Day where I made 156 contacts in 24 hours.
There is definitely a certain skill set needed to be a good POTA/SOTA operator. You need to be able to set up an antenna in all sorts of environments, terrain, and conditions. Often in the eyesight of a nervous audience or park authorities. You need to be able to run a friendly pile up. You have to be able to log your contacts without slowing down your activation. You have to deal with jammers trying to mess you up. It is quite easy after getting good at all of these things to think “Heck, I don’t need Field Day, because I practice these things every time I activate.” Well, my friend, ask yourself why then you only managed to get a couple of dozen of contacts over the “Superbowl” weekend of Amateur Radio? I know, I know, band conditions, amirite?
So, it must be the hunters and chasers that are the real Field Day superstars then. Well certainly with their 1D stations they are. But how does that translate to being out in the field away from their 10 element, half-wavelength, 20-story tall, 10 acre, 160 meter, phased antenna arrays pumping every bit of the legal limit (and, umm, sometimes, and then some) on their Flex three-hundred thousand something radios? Same thing for the big gun contesters (probably some of the same folks) who can rattle off the Field Day exchange in a fraction of a millisecond, only to have to rattle it off over and over and over to the same guy who for the life of himself cannot make out “Xray”, until the contester resorts to anything he can think of to get through the beer-fog of his fellow operator. “Xylophone.” “Xavier.” “Xerox.” “Xyz – X X X X X”. “X MARKS THE SPOT!!!!!!!!”… [VERY LONG DRAMATIC PAUSE AS YOU STAND AGAIN FOR THE OP TO GET YET ANOTHER A SWIG OF BEER] “Oh, got it now. Kilo Echo One Quebec. Got it. Why didn’t you just say so?” I know, I know, band conditions, amirite (again)?
Being a good SOTA/POTA/WWFF activator does not make you a good Field Day operator. Being a good hunter/chaser does not make you a good Field Day operator. And being a good contester does not make you a good Field Day operator. You need to be all three of these things at once. And you have to have the stamina, organizational skills, hardware, RF knowledge, technological savvy, and event planning prowess to make it all work. Especially if you are not operating with a club large enough to provide divisions of labor. And for KX1Q and our two bravo classified station (i.e., two operators, two transmitters, temporary station on emergency power), I was in charge of nearly all of the set up and take down of the radio and tech equipment, whereas AA1F was in charge of all of the fundamental infrastructure (food, water, shelter, and (generator-provided) electricity.
And now after our third year of heading off on our own for Field Day, I have to say, we did pretty good.
STATION STRATEGY (BLOCK DIAGRAM)
In general, our 2025 Field Day strategy was to set up three separate radios, each connected to a computer, two HF antennas, and on UHF/VHF antenna. One station would be AA1F’s. One mine. And one a shared digital station. Only two transmitters would be able to simultaneously transmit, thus our 2B classification. Below is the overall block diagram of our Field Day set-up.

ANTENNAS
We replicated the HF antenna system we used last year. Namely one 80M off-center fed dipole with its balun approximately 20 feet up into a tree and nearly flat horizontal legs strung out in a east-to-west orientation. This connected back to our operating location via 100 feet of LMR400 and 50 feet of RG8X coaxial cables. Once back at the shack, that antenna’s feedline terminated into a coaxial switch that controlled whether or not it went into AA1F’s transceiver (Yaesu FT-891A) or the digital transceiver (Yaesu FT-857D).

The second HF antenna was another 80M OCFD with its balun up nearly 30 feet in a tree and its legs horizontally aligned in a north-to-south orientation, forming roughly an “L”-shape with the other OCFD.

Here you can see me attempting to zoom in on the balun. This antenna uses another 100′ run of LMR400 attached to a 100′ run of RG8X which then attaches directly into the HF port of my Yaesu FT-991A.

The third antenna was a fiberglass dual band (2m / 70cm) vertical mounted on a push-up mast and secured to my van. Details on this tow hitch mount are here and improvements are showcased here. This antenna attaches to either a Yaesu FT60 handheld for monitoring or to the 991A for transmitting.

RADIO STATIONS
Our radio station set-up is shown below. All coaxial and power cables enter into our farm’s garage via a window. Keep in mind this is an entirely off-grid farm with just this structure as its single fixed building. Three tables are arranged in a “U”-shape to attempt to avoid foot traffic through the various wires. My station is on your right when looking at this photo. It is an SSB, CW, and FM station (991A) that can access all HF bands (especially with the LDG-Z100 Plus autotuner) and 2m/70cm. You can see my Heil Pro 7 headset and foot pedal, my Vibroplex Code Warrior Junior paddle for cw, and a couple of handitalkies (with the FT60 monitoring the VHF and UHF). The radio is also attached to a networked computer for logging purposes (more on that later.) I am running this off of a 30W switching power supply (Alinco).
If you look very carefully under the window, you can see the coax from one of the HF OCFD antennas feeding into an antenna switch. As discussed, one of the switch possibilities sends the signal to AA1F’s FT-891 (far left) which is exclusively an SSB station. Again, you can see another Heil Pro 7 headset (which has a foot pedal as well), another LDG-Z100 plus autotuner, and the station’s networked computer. This is also run off of a 30A switching power supply (Powerwerx).
The other switch position sends the signal to the FT-857D which is our digital transceiver. The 857D requires an external sound card in order to successfully operate digital modes. You can see the Tigertronics Signalink sitting between the transceiver and the networked computer. Interestingly, the RT Systems USB-62C CAT control cable failed for reasons that are unknown to me. We proceeded with just the Signalink and manually tuning the WSJT-X frequencies. This station is being powered by a bank of 15Ah Bioenno batteries.
Of note, we also have bandpass filters. We had limited interference between the stations and found ourselves mostly operating without them.

COMPUTER TECHNOLOGY
Now networking these stations so that they can produce a single log file in real time is essentially reinventing the wheel for me every year. I’ve described the various processes I have used here and here, with the latter being more or less the way I did it this year. In any multiple transmitter contest, it is really important to avoid contacting a station that you are unable to get credit (i.e., points) for the contact. This scenario is most common when you call a station on the same band using the same mode accidentally for the second (or third or fourth) time, i.e., the dreaded “dupe” (as in duplicate). While there are a variety of strategies available to avoid dupes (such as assigning each transceiver to a single band and/or mode), the use of a dedicated contest logging software like N1MM is the best one in most cases in my opinion. This is especially true when you have the capability to have your stations be frequency-agile, such as when paired with an antenna with multiple usable bands such as an off-center fed dipole.
The 891 and the 991A were both tethered to Windows 10 PCs via USB A-to-B cables for CAT control. The 857 used the Signalink as an audio control interface for WSJT-X, but did not maintain CAT control (it stopped working precipitously as we were setting up for Field Day and we just decided to manually adjust the radio). All of the computers were connected to the gigabit switch with Cat 6 Ethernet cables in order to form a wired local area network. We did bring in internet access with a mifi device, and I knew I could establish networking wirelessly if I had to. We used N1MM+ logger via its multi-station networking function and it worked flawlessly. Just a note though on WSJT-X, we did not attempt to run WSJT-X inside of N1MM (although it is capable of doing so). My attempts to get this working in the past have ultimately resulted in failure generally mid contest. As a result, we operated FT8 using WSJT-X as a free-standing platform. We then add the results into N1MM+ by hand as we go. Generally if you do this, you would not be able to both network N1MM+ and have CAT control with WSJT-X. But since we ditched the CAT control, we were able to keep N1MM+ networked. Had it not worked out this way, we would have just added the WSJT-X contacts to our master log after Field Day ended (an approach that works given that this would be the only computer running digimodes).
And just a little note about how I operate CW. I use the “Morse Expert” CW app on my phone to decode the stations. I am not particularly good at CW, and I certainly cannot decode 35wpm in my head. I also program two CW memory buttons on my 991A: CH1 = “KX1Q” and CH2 = “2B ENY”. The four visible soft buttons for CW that I program on the 991A are Zin (for zero-beating signals), CH1, CH2, and BRK-IN (for turning CW transmission on or off). I operate at 18wpm. I use my paddle when necessary to fill in gaps. I do use a memory button for SSB as well, just a simple “CQ Field Day” message. I find the use of the memory buttons extremely helpful and efficient in a contest situation when used right.
FIELD DAY 2025 CHECKLIST
Below is an updated version of our Field Day checklist. We did not attempt to construct the military mast and 6M beam this year as it is a tremendous amount of effort for a paucity of points. We did bring equipment for a satellite qso, but did not have a very good passes over the weekend for the FM satellites (SO50, AO91) that we have managed contacts with in the past. I forgot about using the ISS though, so never checked its trajectories. In total, it is very similar to last year’s FD checklist.
MULTIPLIERS AND BONUS POINTS
We went for as many multipliers and bonus points as we could squeeze out…
We ran 100W for CW and SSB, and 40W for digital. Our farm is a business, therefore open to the public. I managed to copy the W1AW bulletin. I posted information about our station on QRZ, including inviting people to stop by our event for the social media credit (hey, that’s the best I can do, I otherwise do not have social media besides this here bloggo). I completed all of the “Field Day Site Responsibilities”. And we submitted our results to the ARRL electronically. Easy Peasy.

We ran our station off of emergeny power, i.e., a gas generator. This is the Harbor Freight 2000W Super Quiet inverter generator. We have had it for nearly a decade and use it frequently given the off-grid status of our farm. It works exceptionally well and handled all of our radio equipment and peripherals (lights, chargers, etc.) with ease. The emergency power requirement was easy for us to handle…there is no other electricity available at the farm!

We set up a public information table.

We charged a battery with the a 60W solar panel (SunKingdom, now unobtanium unfortunately) connected to a Renogy Voyager 20A charge controller (my recommended controller), to a Bioenno 15Ah battery. I always mention that this set-up utilizes a special connector in the Harbor Freight Thunderbolt Solar Connectors kit, and SAE to 8mm barrel plug that fits the Bioenno barrel jack perfectly.

And of course, to show our utmost respect and concern for safety, AA1F provided us with non-alcoholic Guinnesses! (Nah, just kidding, we are simply teetotalers, but wow! these are delicious and nearly indistinguishable from the real thing!)

RESULTS
Ok, so how did we do? I would say pretty good. I made 218 contacts, split about 2/3rds CW and 1/3rd SSB. I managed 2 FM contacts an 3 FT8 contacts. Interestingly, upper side band accounted for only 4 SSB qsos! In general, the higher frequency HF bands (from 20M up) had very poor propagation over Field Day weekend, with 40M being the workhorse through the entire contest, and 80M being alive overnight on Saturday.
Nearly 80% of AA1F’s contacts were either FT8 or FT4 (note, I only call this category FT8 in the chart below, but he did operate both modes). All of his SSB contacts were on 40M! He was definitely a bit of a one trick pony, but really hit his stride operating WSJT-X. AA1F stayed up for the entire contest, operating every hour. I on the other hand, but in about 18 hours or so of seat time. I want to reiterate as well that the 857 DID NOT HAVE CAT CONTROL! AA1F had to manually change frequencies on the radio and had no ability to tune in to a particular FT8 channel. Most of his contacts were made by him calling CQ. He also needed to then manually log the contact into N1MM+. We simultaneously had WSJT-X’s auto-logging feature activated, and did need to go through the results and correct some of them prior to submission.
In total, we surpassed our goal, making 520 contacts! I missed my own personal goal of acquiring 250 contacts though.

Below you can see the distribution of contacts, including all of them, and then by each band.


And on final data set shows that the vast majority of contacts were made to Alpha stations (i.e., Radio club stations in a temporary location on emergency power). The second largest category, a full 1/5th of contacts, was made to Delta stations (people operating at home from their usual shack), and another fifty Echo operators (people operating from their home at their usual shack, but using emergency power). A lot of people think that the home operators are “killing Field Day”. Personal, I just like getting the contacts and am glad everyone is on the air, but here is what the breakdown actually looks like for those keeping score. Please note that I did this by hand somewhat quickly, and “lost” 5 qsos somewhere (i.e., the total comes out to be 515 instead of 520), so not 100% accurate.

SUMMARY
In my opinion, this was an extremely successful Field Day. AA1F and I are actually hesitant to set a higher contact goal for next year because we actually think this may be hitting our limits. I am toying with the idea of acquiring another desktop transceiver, probably the Yaesu FTDX-10, just to get a better digital mode operating experience. I love my 991A though, and do not feel I need a radio upgrade. AA1F on the other hand is extremely comfortable with his 891 and does not have a lot of desire to learn a new radio. So, I mull over in my mind whether it would be worth it or not.
On a personal level, I am deeply satisfied with my ability to arrange a Field Day operation. Don’t get me wrong, there are things I certainly could do better, but all in all, I think this station rocks. The terrain of our location in ENY gives up great access in all directions, and setting up perpendicular 80M OCFDs along an east-west and north-south axes really leverages this. Even though there was limited 2M activity on the bands, the fiberglass antenna on a mount was capable of drawing in a simplex contact from 30 miles away. AA1F simply killed it on WSJT-X; if he did upgrade to a new radio and was willing to stay up again all night next round, I think he would hit another hundred contacts. My own ability to contest on CW is increasingly good. Yeah, I know I am not entirely using my own native ears for decoding, but I am not so sure everyone else is either. Quite frankly, it is side band that is becoming somewhat of a Field Day drag. The tremendous inefficiency of the less experienced contest-style operators can really shine through here. Regardless, I am still glad they are out there and on the air!
I love Field Day. It really was my first entry into radio in some ways when I took on the role of Field Day coordinator for a club within months of obtaining my tech license. I still remember thinking a “tri-bander” antenna was brand name and had to ask for clarification when someone suggested we use it at Field Day. I have since coordinated a lot of group events. These days I tend to reserve my event planning for AA1F and I. We are increasingly set in our ways, want to play the game to the fullest to challenge ourselves and be competitive, get a chance to use our own equipment the way we want to, and quite frankly we both want to sit at a radio for as long as we can once game day arrives. In a large club with only two or three stations set up, the wait for some seat time can be nothing short of excruciating. And as people who do strongly take in to account the wellbeing of others, well, AA1F and I can often get pushed off to the sidelines and never get any time at the radio at all. We have definitely found that our enjoyment of Field Day is exponentially higher when we each have our own dedicated radios to use. Ok, just chalk it up to the fact that we are not great sharers, lol.
At the end of the day, I think that hams should continue to put forth maximal effort into Field Day. Portable operations such as POTA and SOTA are simply not the same thing. To deploy a multi-transceiver, networked, field radio station running off of emergency power that can be erected in 24 hours, stay on the air for 24 hours, and then be broken down in a few hours, and most importantly, can successfully contact other field stations across the United States and Canada is quite an impressive feat. We have seen the need for ham radio operators in national emergencies lately. Communications are not nearly as robust as they seem in my opinion, and I do think ham radio provides a great potential back up system. But POTA and SOTA operators are a bit delusional to think that the typical station they set up with compromised tiny verticals or QRP rigs could provide the same level of comms as a well-done Field Day station. A good Field Day station needs to be found without the benefit of a spotting app. This is really a different type of strategy. And the fact that there is a an underlying contest is not a bug. The competitive nature of Field Day gets you to improve all elements of your set up. So to my fellow portable “every day is field day” radio travelers, put the fourth week of June (and for that matter January for Winter Field Day) on your calendars and give it your all. Ultimately, it will indeed make you a better operator! I know that AA1F and I feel this way.
GEORGIE’S (2nd) FAVORITE GAME
Finally, Field Day was not all work work work… Here is AA1F fending off our part Chupacabra – part Werewolf – part Velociraptor – part “Are you a Malinois?” doggie with a hose. Georgie is some short of shepherd for the record. We did actually get a DNA test which suggested a mixture of Dutch and German, along with some bizarre “Super Mutt” combo. Most people think she is a Belgian Malinois. Regardless, there is almost nothing she likes more than chasing a hose. Except maybe jumping into a lake or playing “Ball”.


Resemblance?
Catch on the flippity flip Loves!
KM1NDY