In Parts One and Two of our field antenna series we looked at a sampling of resonant and non-resonant field antennas. One of the practical differences between resonant and non-resonant antennas is that non-resonant antennas need an antenna tuner in order to properly function.
So, what is an antenna tuning unit (ATU), exactly?
The name “antenna tuner” or “antenna tuning unit” is a bit misleading. The antenna tuner doesn’t actually “tune” an antenna. Instead, its job is to match the antenna feed point (i.e., the end of the feedline) to the 50-ohm impedance the transceiver expects. ATUs essentially protect your radio from an impedance mismatch and ensure that the standing wave ratio (SWR) is as low as possible. With a proper match, more of your radio’s power is transferred to your antenna system.
Resonant antennas are designed to provide your radio with a 50-ohm load if properly deployed. Non-resonant antennas, on the other hand, have either no matching or a modest amount of matching to make achieving an acceptable match easier for the antenna tuner. Simply connect the antenna feed point to the ATU, then connect the ATU to your transceiver’s antenna port and the ATU will do the matching.
Manual or Automatic?
The tuning mechanism and circuits rely on changing the value of inductors (L) and capacitors (C). There are essentially two flavors of ATUs. Manual antenna tuners require manual input to change the L and C values. Typically this is done by manipulating two control knobs (a variable inductor and capacitor) until a match is achieved.
These days, most of the portable ATUs we use in the field are automatic. This means that, once triggered manually or by transmission, the ATU will automatically find the best possible impedance match. The ATU will seek a perfect 1:1 match, but if it can’t quite achieve that, it’ll at least give you the best match it can.
Many modern transceivers even have built-in automatic ATUs that are fully integrated inside the radio. Here is a small sampling of radios that either have a built-in ATU or the option to add one:
- Yaesu FT-710 AESS
- Icom IC-7300
- Kenwood TS-590SG
- Icom IC-705
- Yaesu FT-891
- Elecraft KX1, KX2, and KX3
- Xiegu G90, X5105, and X6100
I’m often asked, “Which is better—an automatic or manual antenna tuner?”
Frankly, I use both. Automatic antenna tuners typically find a match much faster than you could using only a manual antenna tuner. Many modern automatic ATUs can find a new match within two seconds of transmitting or engaging the tuner and then remember that match, so if you move back to the same frequency later the match is almost immediate. Of course, having an automatic ATU integrated into your radio means that there’s no extra accessory to take to the field. Keep in mind, though, that you always need to know how to bypass the built-in ATU for those times when you’re using a resonant antenna.
Manual antenna tuners have a modest learning curve, thus it can take a little time to master their use for rapid matches. That said, manual ATUs have a couple advantages over automatic ones. Obviously, manual ATUs need no power source. You, as the control operator, manipulate the L and C controls manually. Manual ATUs can also function outside of the ham bands since they don’t require a transmitted signal in order to find a match. If you like to listen to shortwave broadcasts with your field radio, a manual antenna tuner will allow you to tweak the impedance match for optimal reception.
Do I need an ATU?
The quick answer is no, you don’t. You can always put together a field radio kit/system that doesn’t require an ATU. That said, I believe ATUs offer up some impressive benefits.
ATUs give you frequency agility
Frequency agility is the advantage of ATUs. Especially when I use one of my field radios with a built-in automatic ATU, I can quickly move from frequency to frequency, even on non-harmonically-related bands with the press of a button. For example, I can finish a series of contacts on 40 meters, then move to 17 meters and start calling CQ within seconds. Using a resonant antenna, I would be restricted to harmonically-related bands.

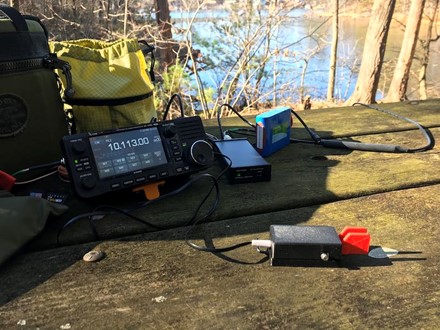
Icom IC-705 with a mAT-TUNER MAT-705PLUS Automatic Antenna Tuner.
ATUs can take your resonant antenna to non-resonant bands
More than once, I’ve set up a 40-meter end-fed half-wave antenna at a park or summit, then hopped on the air only to discover it was a contest weekend and that band conditions were crowded. In such cases, if you have a portable ATU in your field kit, you can easily insert it between your antenna and your radio, then use it to hop on WARC bands where contest activity is prohibited, such as 30, 17, and 12 meters.
And during times of solar flaring, you might discover that propagation doesn’t favor 40 meters but is better on 30 or 17 meters.
ATUs open the door to compact, low-profile antennas
My 40-meter end-fed half-wave antennas are over 60 feet in length. My 9:1 random wire antenna, on the other hand, is less than half the length of my EFHW, yet can transmit on even more bands.
While it’s true that a 31-foot radiator will not be nearly as efficacious as a resonant length antenna, it’s still efficient enough to get the job done and also rack up some DX in the process. Plus with a shorter antenna I have more options for deployment, including setting it up as a vertical on a 31-foot telescoping pole.

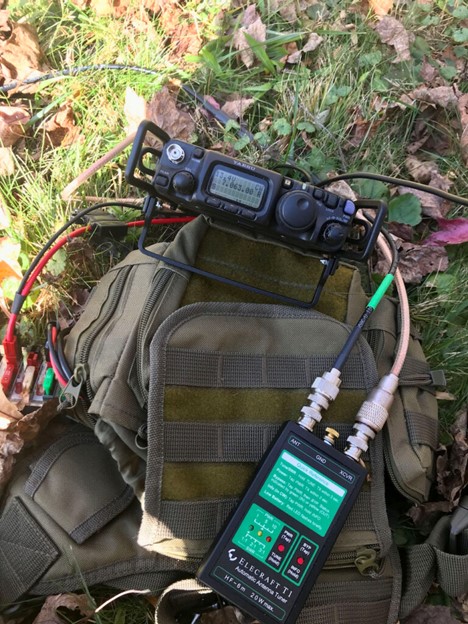
Yaesu FT-817ND with Elecraft T1 ATU.
ATUs open the door to experimentation and affordable antenna options
One of my favorite field antennas is simply two 28.5-foot lengths of wire. One acts as a radiator, the other as a counterpoise, often coupled with the ground. This antenna can be built for less than $6, including the BNC binding post adapter. An antenna tuner with a wide matching range can easily take this simple wire antenna from 40 to 6 meters. In a sense, you might say that the ATU does all the hard work in making these two lengths of wire function.
With a good ATU, you can experiment with a wide variety of wire antennas, verticals, and even loop antennas. I’ve even used an ATU to match two trampoline frames for a special on-the-air event.
ATUs are an “Antenna First Aid Kit”
Last year I went on an 11-mile roundtrip hike to activate one particular summit. While on the mountain, I accidentally damaged my antenna to the point that it could not be properly deployed. Looking at the broken antenna, I was ready to simply pack up and leave…but then I remembered that I’d brought along my Elecraft KX2, which has a built-in ATU. I deployed the antenna as best I could–no part of it was ever more than five feet off the ground–and my KX2 quickly found a match. I called CQ SOTA and my very first contact was a chaser in Spain, over 4,000 miles away! Without an ATU, I could never have completed that activation.
During my travels I’ve also activated some sites where I discovered, often only after arriving, that only very short trees and bushes were available to support my resonant antenna. Since the deployment in such instances wasn’t exactly optimal, I wouldn’t have been able to get an acceptable match without employing an ATU. But with an ATU? I was on the air in short orderwith no problem.
In short, ATUs are like a first aid kit–I think every field operator should own one. Not only do they open the door to experimentation, but they can make it possible to operate in the field when conditions aren’t ideal or, say, during an emergency event.
A Sampling of Field Radio ATUs:
- LDG Z-100Plus (Automatic)
- MFJ-939I (Automatic)
- MAT-125E (Automatic)
- MFJ-971 (Manual)

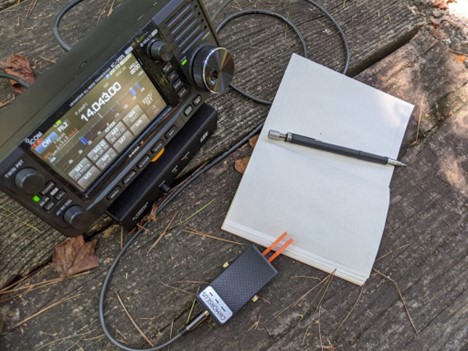
Icom IC-705 with an LDG-Z-100PLUS Automatic Antenna Tuner underneath
Finding the right field antenna(s) for you
If there’s one thing I hope you’ve gathered from this three-part series on field antennas and ATUs, it’s this: Your antenna is a crucial component of your field radio kit. Spend some time assessing your needs and decide what might work best for you.
Keep in mind, too, that there’s an antenna solution for every operator, for every environment, and even for every budget. You need not limit yourself to one antenna. In fact, I always suggest field operators carry both a wide aperture wire antenna, plus a wire option, vertical option, or loop option that is self-supporting at the very least. This gives you an antenna option for almost any environment, even for areas that are sight unseen.
The most important part? To have fun! I get a huge thrill out of putting a new antenna design on the air, and I hope you do, too. So toss up those lines, guy up those masts, deploy those supports, and get out there–on the air!
No comments:
Post a Comment