If we had another hiccup in the food chain as we did in the spring, you’d probably keep up with it via the internet — by monitoring sites like The Prepared, or by checking social media. But what if the supply chain problems were combined with a cyberattack or other disruption to the internet or broadcast media? How could you communicate with other people around the country to find out whether empty shelves were a local phenomenon or a nation-wide one?
The AmRRON emergency communications network recently held a training exercise simulating this exact scenario. Using high-frequency ham radios and the JS8Call digital communications protocol, operators around the country shared the food supply situation in their location.
The resulting exercise was a success, and it showed that it’s definitely possible to use ham radio to keep track of food supplies in a complete grid-down, or when normal communication channels are disrupted. It’s not easy, and it requires a lot of specialized knowledge and equipment, so it’s not a prep for everyone to get into. But for preppers willing to head down the rabbit hole, it feels great to know you’ve got a critical information lifeline that works even in the very worst-case scenarios.
More: Beginner’s guide to amateur (ham) radio for preppers
Here’s what you need to know:
- Digital ham radio modes let you communicate with others, keyboard-to-keyboard, with a computer.
- Ham radio digital modes are more complicated than voice but offer a number of advantages for emergency communications.
- You can run a digital ham radio station entirely off-grid without any infrastructure.
- Digital modes aren’t like Slack or Twitter. They’re much slower and less certain.
- JS8Call is a new digital mode that has taken off with preparedness-minded ham radio operators.
- Ham radio is a good investment but a big one. Put it near the bottom of your prep priority list.
What is AmRRON?
AmRRON is short for The American Redoubt Radio Operators Network. The American Redoubt is a survivalist migration movement with the goal of relocating to the Northwestern United States—particularly Idaho, Montana, and Wyoming—under the assumption that will be the safest place to live if society collapses. That might make you jump to a number of conclusions, but interestingly, the redoubt’s originator, James Wesley Rawles, was an avowed anti-racist years before it was cool. (I’m not aware of Rawles being involved with AmRRON.)
That may not be your scene, but outside of ARES and RACES, which are focused on disasters, AmRRON is the premier amateur radio prepping network. If you have an interest in ham radio, it’s a good resource to be familiar with. There is also The American Preparedness Radio Network, which merged with AmRRON years ago but still holds its own “nets” (meetings over ham radio).
You can pay a little money to officially join AmRRON, but their training materials are all publicly available and their nets are open to all amateur radio operators. There are plenty of clubs that “meet” on the air, but due to the fact that encryption is not allowed on ham radio and literally anyone can listen in, secret clubs just aren’t a thing.
One of the things that make AmRRON interesting is that while they do communicate over voice (or “phone” as hams call it), they make extensive use of ham radio’s digital modes.
What are digital modes and why do they matter?
When you think about ham radio, you might picture a guy sitting at a desk, leaning over a microphone, surrounded by a multitude of mysterious electronic boxes. That’s not an unfounded stereotype, but there is a lot more to ham radio than just talking over a microphone.
Digital modes let you connect your ham radio to a computer and use various applications to send digital signals to other computer-connected stations. There are a number of advantages to digital:
- Security: It’s much harder for someone to listen in on your conversation. While encryption isn’t allowed in ham radio, publicly documented digital signals are. For someone to intercept the conversation, they must be able to identify which of the innumerable protocols it’s encoded in, and then configure a computer to decode the signal.
- Resilient to noise: Noise is an ever-present annoyance in high-frequency communications. Computers can pick up and decode weak, noisy signals that your ear cannot.
- Hands-free: With phone, if you miss a message you just miss it. But digital modes are constantly logging traffic, so you can step away for a minute and not miss a message. JS8Call can even reply to many queries automatically, which was key to this exercise.
- Efficient: While phone communications take up an entire frequency (and then some). You can have multiple digital signals operating on the same frequency at the same time by transmitting in different areas of what’s called the passband.
- Additional capabilities: There are things you can do over digital that you just can’t do with phone like automatically send your location. You can even do things like send SMS text messages and email, though I won’t cover that here.
However, there are downsides to digital modes:
- Slow: Remember dial-up Internet? Digital modes are slower than that. It can take up to a minute to transmit a sentence over JS8Call. It’s a challenge to keep your messages as short and concise as possible while still being readable.
- Complex: Ham radio is complex enough, but digital modes add an entirely new layer of complexity, and the interfaces for these programs are not user friendly.
- Flaky: If you’re used to chat services like Slack where everyone knows who’s in the channel and everyone sees every message in that channel, ham radio digital modes can be frustrating. If another radio can’t “hear” your message, it won’t make it through. Also, because messages take a long time to send, another station might transmit over your signal, creating jumbled messages. That’s not the fault of the software, but just a reality of ham radio.
Despite those disadvantages, many preppers have adopted digital modes for the many benefits they offer. JS8Call is a fairly new digital protocol that has taken off in the ham radio prepping community for its excellent handling of weak signals, power efficiency, automation capabilities, and how it can relay messages between stations so you can reach a station that could not otherwise hear you.
The app for using this protocol is free, open-source, and available for Windows, Mac, and Linux.
Most radios need special cables to connect to a computer, but don’t be intimidated: it’s all audio. The radio sends audio to the computer when receiving, and then the computer sends audio to the radio when transmitting. If you’ve ever seen the movie Wargames, where Matthew Broderick dials an old-fashioned phone and sets it in a cradle to make a data connection, it’s the same basic concept. If you tune onto a frequency where someone is transmitting you’ll hear horrible digital screeches that will take you back to the days of dial-up internet.
Some radios, such as the Icom IC-7300, feature a built-in sound card, so all you have to do is connect a single USB cable to the computer, but fundamentally it’s a simple analog audio connection.
With the basics out of the way, let’s take a look at using JS8Call in the field.
Setting up for the exercise
The exercise began at 10 AM and was scheduled to run until 2 PM, so I was up bright and early to pack my gear. The exercise instructions encouraged operators to work entirely “off-grid” if possible.
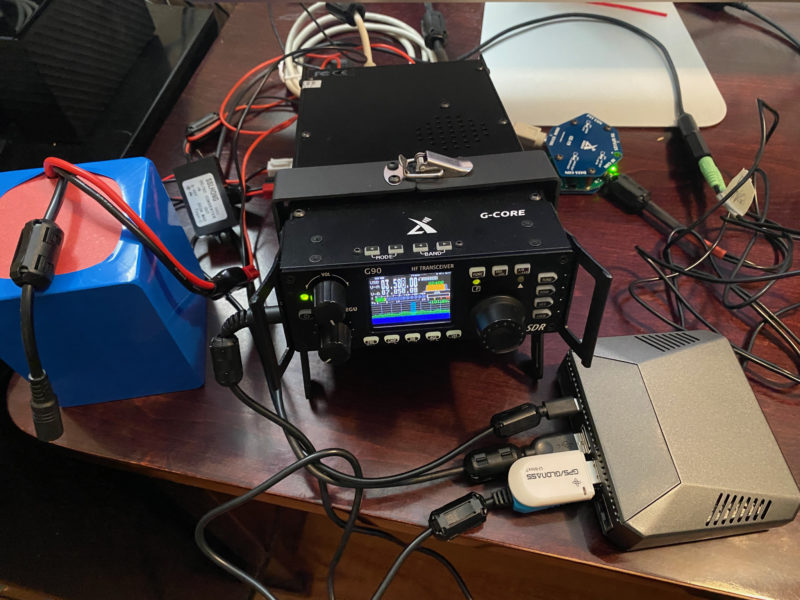
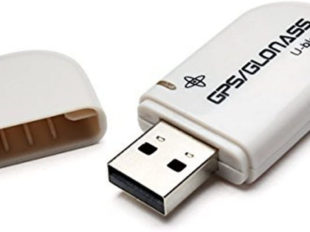
My Xiegu G90 transceiver operates from a battery full-time, so it’s already effectively off-grid, but the problem was that JS8Call requires accurate time to correctly sync messages. When you’re connected to the internet, this is easy, since most modern operating systems sync time through the Network Time Protocol. But if you’re truly “off-grid” that’s not an option. However, thanks to a cheap U-blox GPS dongle connected to my Raspberry Pi, I can sync my time with those satellites. But to use GPS reliably, that meant moving the rig outside to get a clear view of the sky.
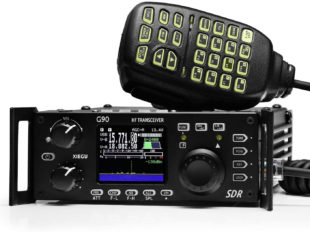
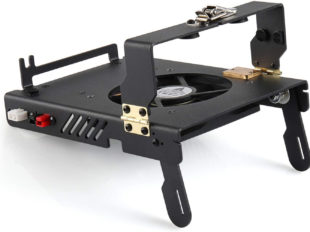
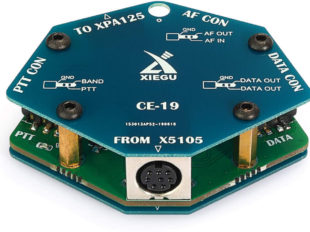
I set up my rig at a table on my back patio: the Xiegu G90 connected to its fan stand, Xiegu CE-90 module that lets me connect the radio to a computer, a Raspberry Pi 4 in an Argon One case, and the 9 Ah Bioenno battery that powers everything. I rerouted the coax connection from my Chameleon EMCOMM III Portable antenna from my home office to the back patio and connected it to the radio.

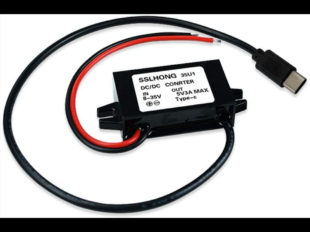
You may wonder why I brought a Raspberry Pi instead of a laptop or a tablet. The simple answer is: they’re popular in ham radio and have a lot of available tools, like K4MACK’s Build-a-Pi script that can automate setting one up for ham radio. But also, they’re incredibly power efficient. I used an inexpensive buck converter from Amazon to take the 12 volts coming from the Anderson Powerpoles in my G90’s fan stand and convert it to a 5-volt USB-C connection suitable for the Pi. The radio and the Pi work together as a unit, both powered from the same battery.
The Pi is completely headless, which means I don’t carry a keyboard or screen for it. I brought along an old iPad mini to use as an interface. With a VNC remote desktop connection, I could log into the Pi and do everything I needed. Thanks to KM4ACK’s Build-a-Pi script, the Raspberry Pi serves as its own Wi-Fi hotspot so I can connect the iPad mini directly, making the entire setup 100% off-grid.
The basic connections were easy, but the software proved to be a challenge. There is a bug in the KM4ACK script where it won’t display the GPS coordinates on the desktop if it boots with the GPS connected. So I had to repeatedly unplug the GPS dongle and plug it back in before I could get a satellite lock (KM4ACK recently released a video offering a proper fix). I used a utility on the Pi called xgps that displays which satellites are available and which ones have a lock. Once I was locked onto the satellites and getting reliable grid square information, I felt confident enough to fire up JS8Call.

But first I had to open an application called flrig, which lets me control the radio with my computer to change frequencies and transmit. My installation of JS8Call is configured to tap flrig for this, so it has to be open or JS8Call displays an error message.

Tracking the food situation
Once I’d worked out all the kinks and had tuned to the designated frequency, it was just about time for the exercise to begin. The mission was simple:
- Collect as many food supply status messages as possible.
- Connect the food status to a grid location on a map.
- Color the map to get an overview of food availability across the United States.
- Submit a report with findings.
I start off every JS8Call session by sending a “heartbeat” signal, which lets other stations using JS8Call on the frequency know that I’m on the air. JS8Call can be set to reply to these heartbeats automatically, which every station participating in the exercise was supposed to have enabled.
Stations that you hear are listed in the right-hand pane of JS8Call, identified by their callsign. If a station replies to your heartbeat, a star is placed by the callsign, letting you know that you can hear that station and it can hear you.

Part of JS8Call’s automation capabilities is the option to store brief messages in the Info and Status fields in JS8Call’s settings. For this exercise we were to enter our color-coded food availability information in the Info field:
- Green: Normal. Everything is readily available with no shortages.
- Yellow: Fluctuating availability.
- Red: Dangerous, food rarely available.
I set mine as “Food Avail=YEL” since we don’t have shortages in my area, but some items are often unavailable. Because I had that set, other stations were able to query my station by sending a message directed to me that said INFO?. My station then would automatically send the “Food Avail=YEL” message.
In addition to that, we were instructed to send out our station info approximately once every 15 minutes between 1900 and 2300 in the passband, represented by the “waterfall” at the bottom of the JS8Call window, which is a visual representation of activity on the frequency.
As I said above, you can have several signals going back and forth at the same time on the same frequency at different points in the passband. But that also meant I had to keep an eye on the waterfall to watch for incoming signals to make sure my signal wouldn’t step over them, which meant I either had to adjust my transmit position on the waterfall or wait for their transmission to finish. Fortunately, since we were all repeating our transmissions regularly over the four-hour period, every operator had multiple chances to collect the needed information.
In addition to the food availability status, I also needed to know the operator’s grid location. Ham radio operators use a system called the Maidenhead Locator System, which divides the world into apportioned grids, like EM16 for north-central Kansas or CN96 for southeast Washington State. Grid coordinates can be extremely precise, like BL11bh16, but that wasn’t required for this exercise.
I sent my status and it wasn’t long before the left-hand JS8Call pane began filling with transmissions. Here’s a quirk I haven’t exactly wrapped my head around yet: all incoming messages are grouped by their position on the waterfall, not by the callsign of the operator. There is a message pane in the center of the window that displays the messages you transmit and messages heard from your position on the waterfall.
But if a message is heard on that frequency outside of your waterfall position, they’re jumbled up in that left-hand pane. Thankfully, you can double-click one to copy it to the center pane, but it combines all the messages from that position together.

I’m not sure why things work this way. I’m sure there is some ham radio reasoning that I have yet to wrap my head around. But the end result is that I had to be extra careful to make sure I was pairing the correct callsign, grid coordinate, and food status.
I soon decided the iPad mini was a mistake. My eyes aren’t that old yet, but staring at so much jumbled information on a small screen in the sunlight gave me severe eye strain. Another problem was that after an hour, the iPad’s battery had dropped to 60% from a full charge, which was way more power consumption than I had anticipated. Thankfully, I dug a battery bank and solar charger from my bug-out bag that kept me operational all day.

At least my eyes got a break from my low-tech method of tracking the information, which was a simple table I made to track call signs, grid coordinates, and food status.
As the hours passed, the message list grew, but I already had much of the information, so I had to really strain my eyes to spot new callsigns and grid locations. The exercise instructions encouraged us to try relaying messages to distant stations, which I experimented with but was never sure if they were getting through. Receiving relayed messages was also a challenge, since they include the callsign of both the originator and the relayer, so trying to figure out which was tough.
In the last hour of the exercise, things really started to heat up. Transmission frequency increased. However, I was frustrated that I saw a star next to only a handful of stations. Based on my experiments with WSPR, I knew that on a good day, I could reach as far as New Zealand and Antarctica. I cranked up the Aux In setting on my radio, sent out a heartbeat, and my station list was flooded with new stations and more stars. Better late than never, but who knows what I missed?
When all was said and done, I had cataloged around 30 station reports. Some were missing callsigns (not as important), grid locators, or status messages. I combed through the JS8Call log to fill in what I could.
I then opened a copy of the map on my iPad and used iPadOS’s built-in PDF markup tools to color in the map (my Mac would have been easier, but I was determined to stay off-grid). Some grid locations had conflicting reports, so I did my best to add a bit of both colors to those grid squares.

My own map was pretty close to the published results, with the exception of a few West Coast stations.
What I learned
Overall, I consider the exercise a success. I received multiple reports around the United States that gave me a picture of general food availability: some things are spotty but overall good. And I was able to gather that information without any infrastructure. In the case of an actual emergency, as long as I have my gear and antenna, I can send out status messages and calls for help even if the power and internet are out.
I have a lot more to learn about the effective usage of JS8Call. One thing I learned mid-exercise is that the station list can be set so it shows the operator’s grid location, which is apparently sent along with the heartbeat. I sent a lot of requests for grid locations that probably were not needed. With message transmission being so slow, you don’t want to transmit unless you have to.
I’m also dedicated to finding the optimal transmit and receive volumes for my radio, as I learned they can make a huge difference. JS8Call can send out a “tuning” signal that lets me experiment with those things.
While I’m happy with my setup, I wasn’t pleased with the iPad mini, either in viewability or power consumption. It’s older so maybe the battery is a bit worn, but it’s unacceptable as is. I’ll have to do some research on what will make a better display. I may even be better off buying something like a Microsoft Surface tablet and connecting it to the radio instead of using the Raspberry Pi.
I’d also like a more-portable antenna. In theory, the EMCOMM III Portable is… portable, but it’s such a pain to set up that I don’t want to take it down unless I have to. I’m planning to buy a Wolf River Coil TIA vertical, which would be a lot easier to set up in the field. No need to throw rocks at trees, just set up and go.
Finally, there was something missing from my kit: a solar panel and charge controller to keep the battery charged as long as needed. That said, I had no power issues during the exercise. The Bioenno battery held up like a champ. But I did take advantage of a Prime Day deal to pick up a Renology panel and charge controller.
What you need to do this
Interested in diving into the world of digital amateur radio? First, you need a General-class license from the FCC (or an equivalent if you’re outside the United States). There are three classes of amateur radio licenses in the United States: Technician, General, and Amateur Extra. Technician gives you only very limited access to frequencies in the HF range, which is what you want to achieve long-distance communications.
I won’t lie, that’s a pretty big hurdle since you first need to attain a Technician license, though you can test for both in a single session. And the General exam is much more difficult than the Technician. I used HamTestOnline to prepare for the General exam. Thankfully, you can now take the ham radio exams online over a Zoom session. HamStudy offers a list of upcoming online exams.
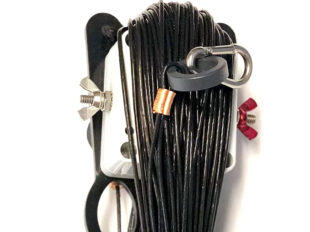
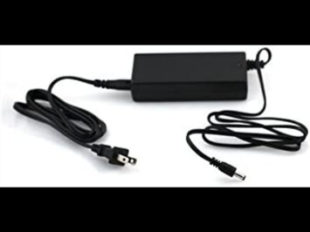
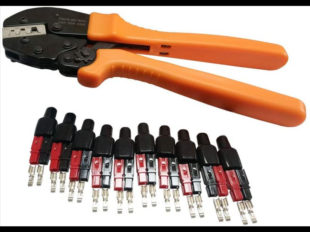
Once you’re licensed, you need gear. That means a radio, a means to power it, at least one antenna, and for digital modes, a computer. Plus cables to power and connect everything. The considerations are too much of a rabbit hole for this post, but I’ve included a kit of all my gear if you’d like a one-stop-shop. (I walked through my reasoning behind much of this gear in a prior post on prepping deals.)
Radio, Antenna, and Power Supply
8 items | $ 958.45


Raspberry Pi and Accessories
9 items | $ 180.50


If you’re not licensed yet, but would like to listen in (which is completely legal), you could go ahead and buy the equipment and just avoid transmitting, or you could purchase a shortwave radio that supports single-sideband (essential to listen to ham radio) and has an audio output you can run into a computer.
Is it all worth it?
It took a lot of study, research, and expense to get to the point where I could participate in this exercise. Resources that could have been put into any number of other preps. Was it worth it?
Yes, I think so. Communications are essential in real-life SHTF situations. During the Bosnian civil war of the 1990s, ham radio operators were able to keep separated families in contact. Someone who lived through the Venezuelan unrest said, “Those of you with Ham equipment will be hailed as heroes should this situation come to a theater near you.”
That being said, I would put ham radio near the bottom of your prep plans. Water, food, first aid, and defense are all more important, and without those key elements, your ham radio gear won’t do much good.
No comments:
Post a Comment