Several months ago I had an idea for building a CW paddle onto my SOTA logging clipboard. The resulting prototype, to my surprise, worked out quite well. Since then I’ve built a couple of different versions and used them on 50 or so activations with only a few minor teething problems.
The basic idea for the key is pretty simple - use narrow conductive fabric tape to make opposed keying pads on the front and back of the clipboard by laying out several parallel strips of tape on each side then connecting alternate strips to appropriate terminals of a 3.5 mm stereo jack. Alternate strips on the front pad are connected to the jack’s tip and ground terminals while strips on the back pad are connected to ring and ground terminals.
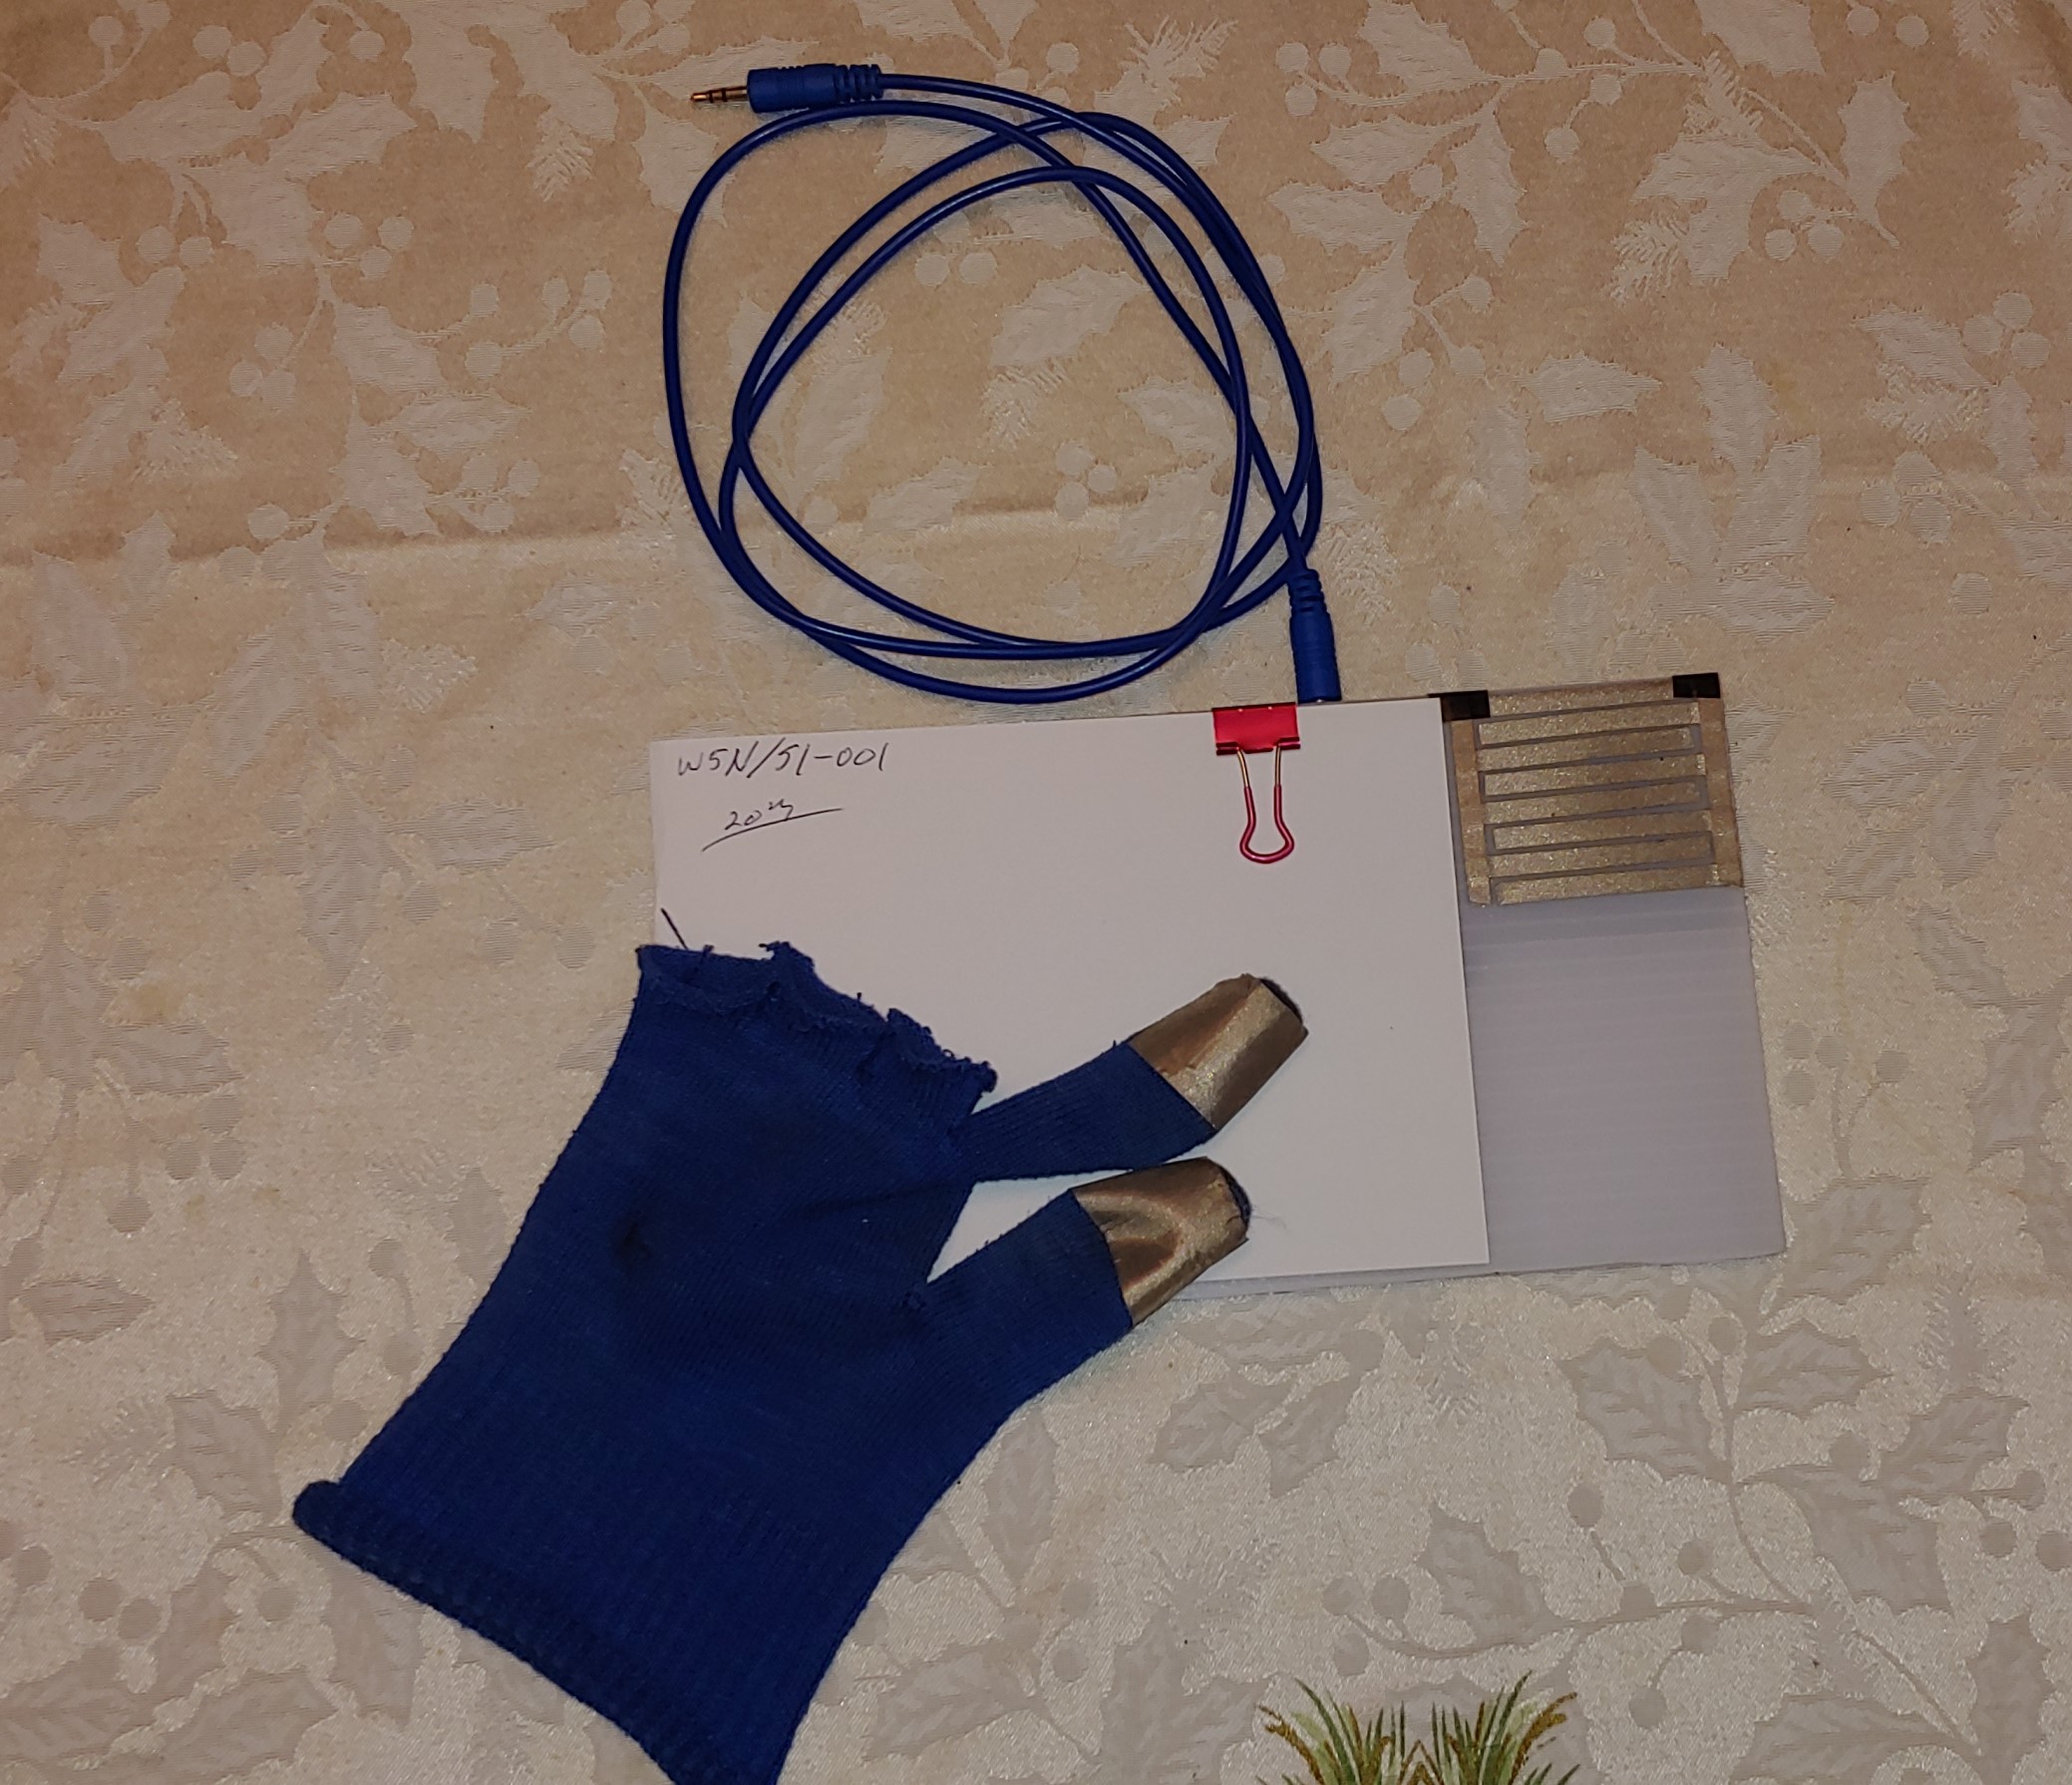
Put conductive material on the thumb and forefinger of a lightweight glove, connect the clipboard jack to the rig’s key input with a stereo cable, then key the rig by touching the pads with the conductive glove fingers to bridge the gaps between strips.
So it works electrically like a standard paddle but you operate it sort of like a “touch key” but with no external capacitive or pressure sensing circuitry.
Here are some pics that will hopefully help clarify things.
Back side
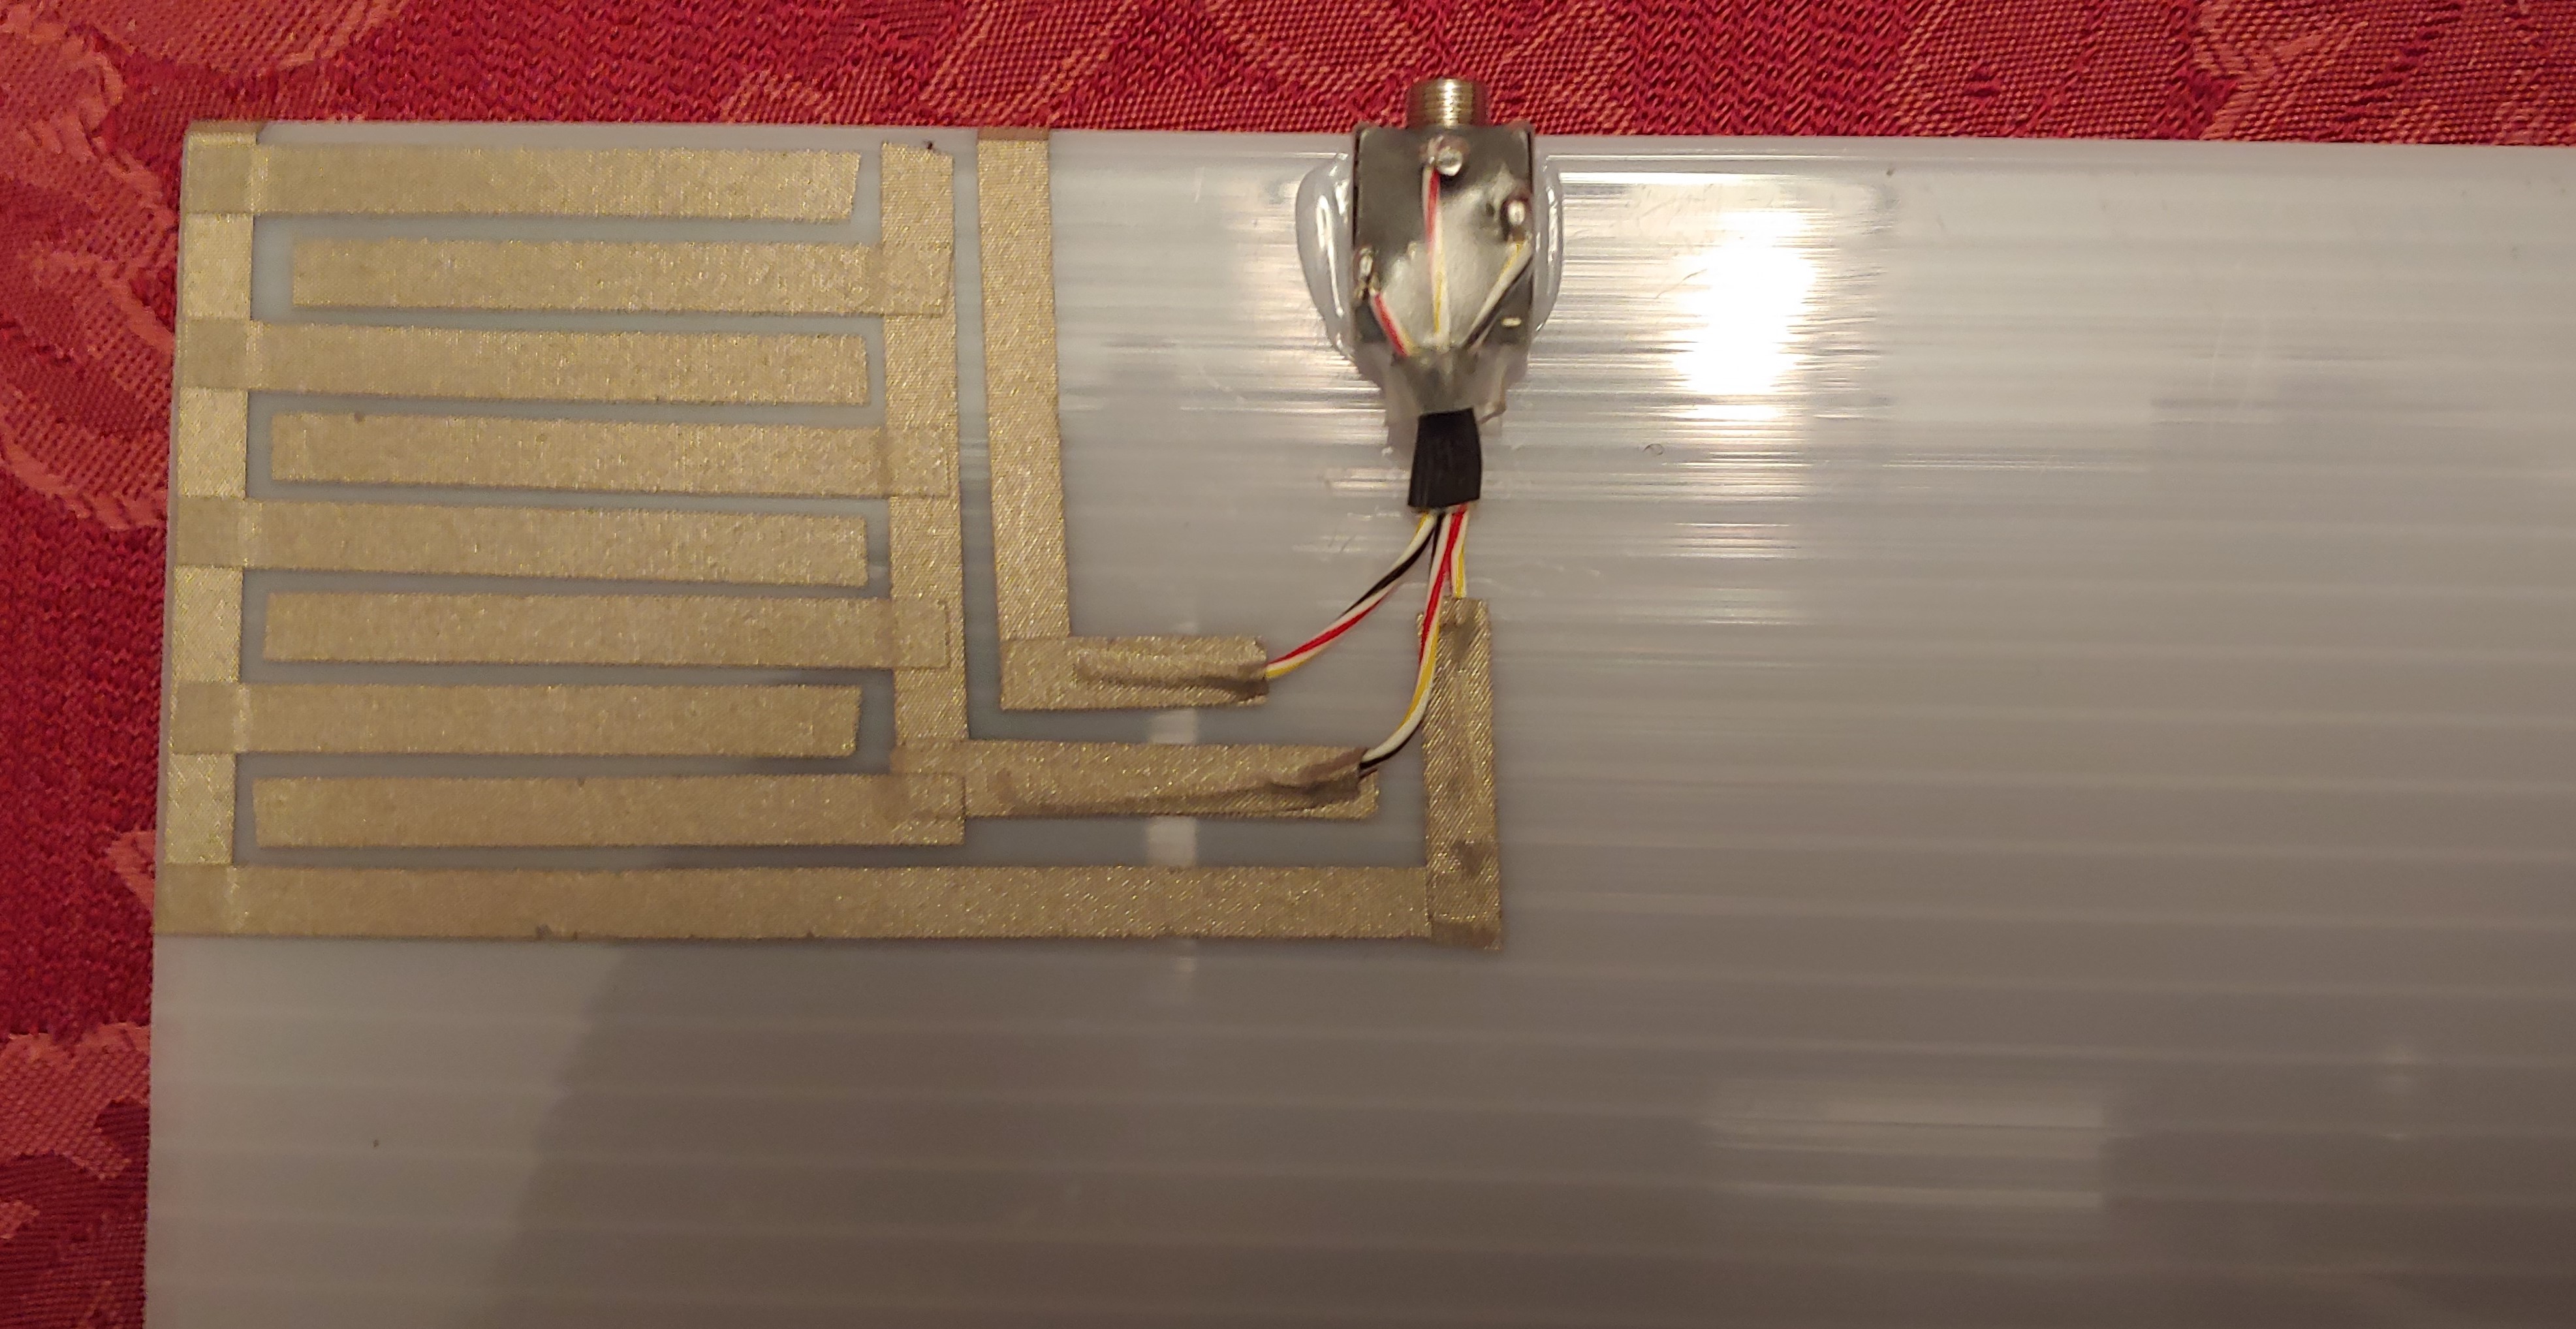
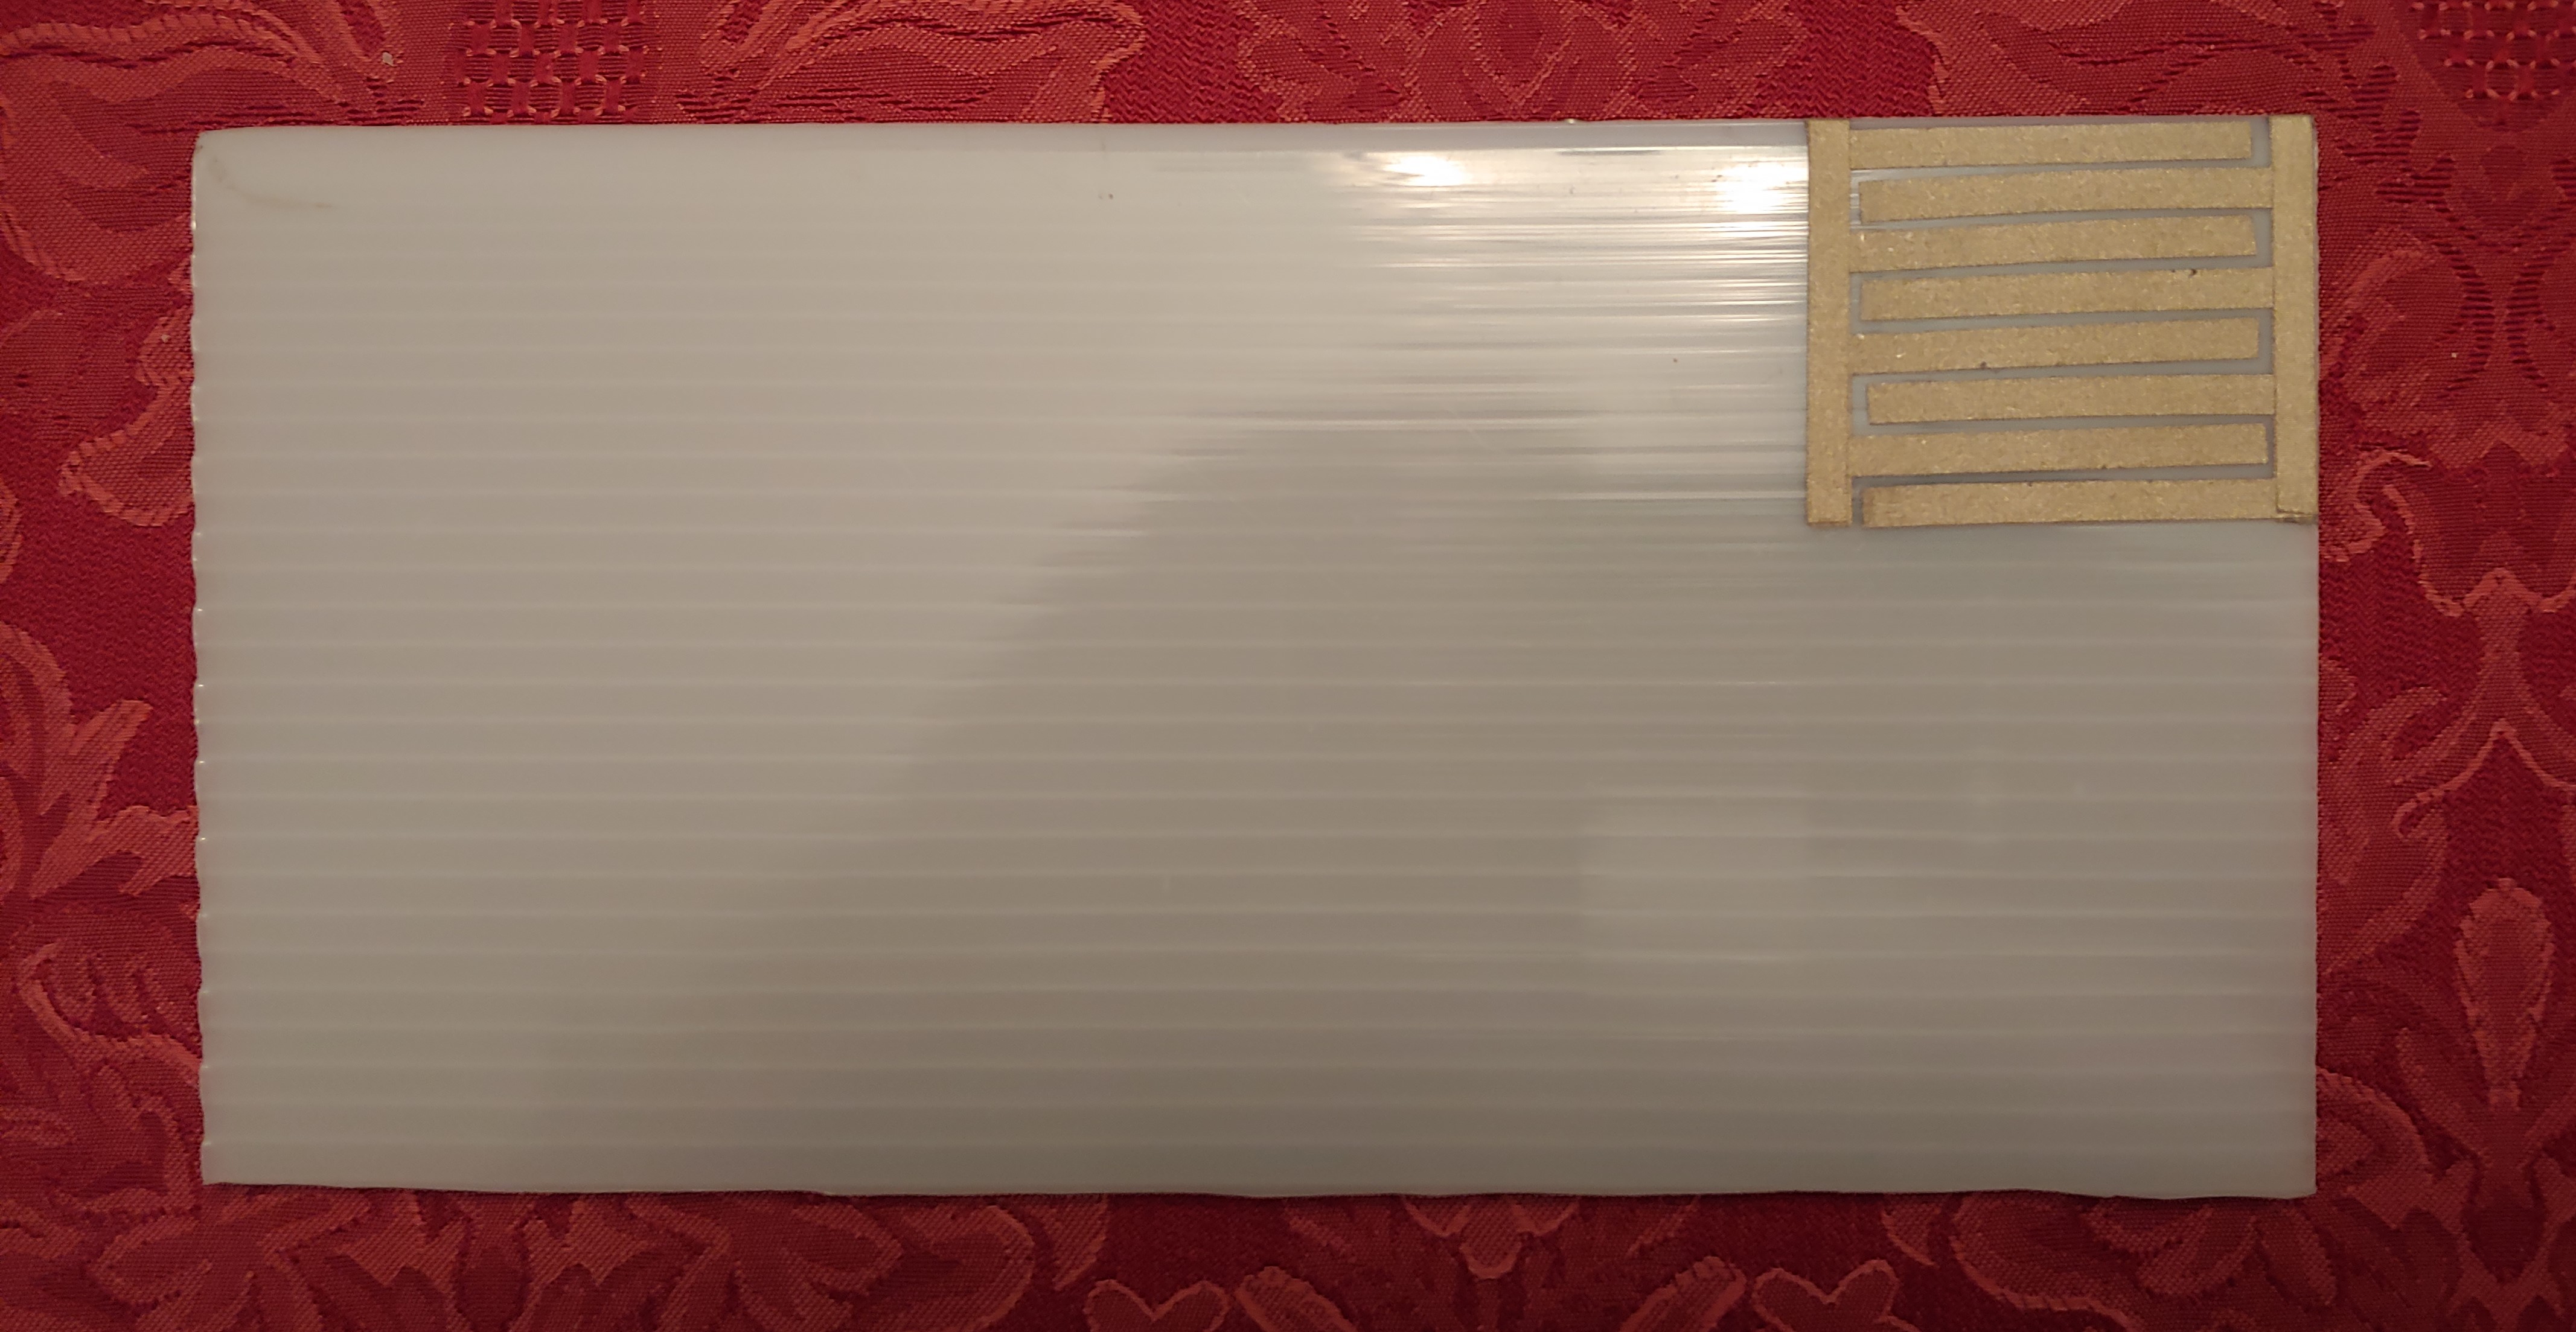
Front Side
Set Up for Operation
Pros: Minimal weight and cost. Rugged and easy to build. Quite reliable with no moving parts, no extra circuitry, no extra power requirements. A very low profile and no need for special protection when carrying. Works fine with all my SOTA rigs – KX1, KX3, ATS3 and MTR5B – and with the Winkeyer USB at my home station. I don’t see why anything that works with mechanical paddles would have a problem. No need for special mounting arrangements. I just hold the clipboard as I normally do. As far as feel – what feels better than your own fingers.
Cons: Wearing a lightweight glove. To my surprise this hasn’t bothered me and I really thought it would. I’ve been using an old liner glove that lost it’s mate. It’s light enough that it doesn’t get in the way and I’ve been able to send fine at my normal 25 wpm. Experiments with bumping up to 28 or 30 wpm have resulted in normal error rates at those higher speeds.
Here’s a link to a short YouTube video of me sending at 28 wpm on an MTR5B using the clipboard/key.
The clipboard for the key shown is a piece of scrap corrugated polycarbonate sheeting typically used for glazing greenhouses. Interesting stuff - very strong and light. The clipboard/key weight, not counting glove or cable, is right at an ounce. The glove adds half an ounce. To the right in the video are a pair of conductive “finger cots” I made from the cut off liner glove fingers. The cots weigh almost nothing.
A trick that helped me simplify tape layout was to realize you can overlay tape runs without creating a connection by using an intermediate layer of ordinary electrical tape.
A 65 ft role of the 5mm conductive fabric tape I used is available at Amazon for $6.99. The entire clipboard setup certainly takes less than 3’ of tape so there’s plenty in one role to absorb mistakes and/or experiment with other configurations. The tape is reliably conductive on the the adhesive and non-adhesive sides - a must for this application.
Here’s the tape link:
https://www.amazon.com/Conductive-Fabric-Adhesive-Laptop-Shielding/dp/B01ALDR0D0/ref=pd_ybh_a_2?_encoding=UTF8 13
https://www.amazon.com/Conductive-Fabric-Adhesive-Laptop-Shielding/dp/B01ALDR0D0/ref=pd_ybh_a_2?_encoding=UTF8 13
You can’t solder to this tape. Connections between the tape and hookup wire leading to the jack terminals were made by stripping 3/4 inch of wire and sandwiching the spread wire between two strips of tape. The tape adhesive is quite strong and this arrangement produced good electrical and mechanical connections.
This type of tape is widely used for computer EMI protection or making “paper circuits”. There are many other options on Amazon and I’m sure you can find similar stuff on Ebay, etc.
73,
Mike - ke5akl
No comments:
Post a Comment